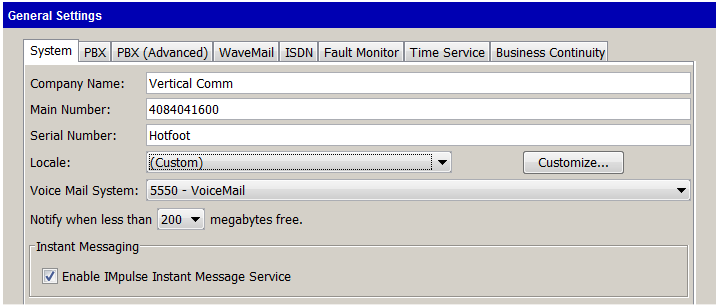
Unlike a traditional PBX, Wave manages phone traffic by user and role, rather than by device, giving you the flexibility to handle users who move from phone to phone. Roles are templates of specific permissions that you can use to create categories of users with different permission levels, such as Admin users (see Managing roles .)
| • |
|
| • |
|
| • |
|
| • |
|
| • |
|
| • |
|
| • |
|
| • |
|
| • |
|
| • |
|
| • |
|
| • |
|
| • |
|
| • | The Phone \ DSS Consoles tab |
| • | The Phone \ Ring Patterns tab |
| • | The Phone \ SIP tab |
| • |
|
| • | The Phone \ Automatic Log Out tab |
| • | The Phone \ Networking tab |
| • | The Phone \ Wave Phonebook tab |
| • | The Audio tab |
| • | The Audio \ Hold Music, Voice Title, and Disk Usage tabs |
| • | The Security tab |
| • | The Security \ Permissions tab |
| • | The Queue \ Attributes tab |
| • | The Queue\ Skills tab |
| • | The Dial-by-name Directory tab |
| • | The ViewPoint tab |
| • | The Sharing tab |
Warning! You must have a Station license available for each user that has an assigned internal slot:port other than 0. Users with a slot:port of 0 and external stations do not require station licenses.
User options are set in both the User/Group Management applet and ViewPoint.
| • | Some options can only be set in the User/Group Management applet. These options are described in detail in this chapter. |
| • | Some options can only be set in ViewPoint. These include the user’s routing lists, contacts, voicemail greetings, call rules, and personal ViewPoint Groups. ViewPoint options are described in detail in the Wave ViewPoint User Guide. |
| • | Some options can be set in both places. You can set up users with standard defaults for your organization and then individual users can override or customize the settings further. You also can restrict the some of options that users can customize. |
You can also set user options in bulk via user templates. See Creating and updating users via a user template for more information.
You can add Wave users using any of the following methods:
| • | Adding users via the User dialog. |
| • | Creating and updating users via a user template. |
| • | Importing users via a CSV file. |
The Admin user comes pre-defined in Wave, and belongs to the Administrators role. The Admin user and all users who belong to the Administrators role are permitted to run the User/Group Management applet. They also can perform all administrative functions.
You can give individual administrative permissions to any user—for example, permission to shut down the phone system—without making the user a member of the Administrators role. See Wave permissions.
Changing the Admin user’s password
Immediately after installing Wave, you should change the passwords of the Admin user and Operator user, in order to make your system more secure from unauthorized access. For more information, see Changing the Admin and Operator passwords.
Adding users on a Wave IP 500 Server
When you add a user, you specify the type of phone (SIP, digital, or analog) assigned to that user (as described in Specifying a phone type and model).
On a Wave IP 500 Server, be aware of the following limits when you add users:
| • | A maximum of 50 analog, digital, and SIP phones are supported in a mixed configuration. |
| • | A maximum of 50 SIP phones are supported in a SIP-only configuration (with no digital or analog phones) |
| • | A maximum of 48 digital phones are supported in a digital-only configuration (with no SIP endpoints or analog phones) |
Increasing the number of digital phone users on a Wave IP 500 Server
The Wave IP 500 requires an external power supply to provide power to digital phones. When you ordered your Wave IP 500, the appropriate model external power supply was included, based on the number of digital phones you planned to support.
| • | The 120W external power supply supports up to 24 digital phones. |
| • | The 180W external power supply supports up to 48 digital phones. |
If you add digital phone users to your Wave Server at a later time, you may need to upgrade the external power supply to avoid any problems. Contact your Wave provider for more information.
Note: In a worst-case scenario—a very heavily-used system with all phones in constant use at full power (all LEDs on, speaker phones on full volume, and so forth), the external power supply could shut down and all digital phones could stop working.
Adding ViewPoint Mobile App users
While the ViewPoint Mobile App is supported on all of Apple's idevices, including the iPhone—iPhone 3GS, iPhone 4, and iPhone 4S—and the iPad and iPod Touch, the available functionality varies. The App allows a user to make and take calls (on the iPhone) and access some ViewPoint features (on the iPhone, iPad, or iPod Touch).
| • | iPhone. iPhone users rely on the iPhone’s built-in voice capability to take and place calls. |
| • | iPad or iPod Touch. These users can use the Viewpoint Mobile App to manage personal status, check voicemail, send Instant Messages, see other users’ presence information and personal status, and check their Call Log, but they must use a separate phone to take and place calls since these devices do not have built-in voice capability. |
Important! Although third-party SIP softphones are available for these devices, they are not supported for use with the ViewPoint Mobile App because they can negatively affect battery life.
For details about using the ViewPoint Mobile App, see Chapter 14 in the Wave ViewPoint User Guide.
License requirements
In order for users to log in and make and take calls using the ViewPoint Mobile App, you must obtain and activate adequate Wave ISM User licenses. (Each Wave ISM User license is bundled with licenses that allow one user to run both desktop ViewPoint and the ViewPoint Mobile App.) For example, if n licenses have been activated, the n+1 and subsequent users will not be able to log in and connect to Wave, but will be able to see items that are available when the ViewPoint Mobile App is disconnected, such as voice messages, Call Log entries, and contacts.
ViewPoint Mobile App user configuration
To enable a user to use the ViewPoint Mobile App, in the User dialog:
| • | Required: Enable the user permission Allow ViewPoint Mobile Connection on the Security / Permissions tab. See Wave permissions. |
| • | Optional (but recommended): Enable the setting Imitate a Mobile Extension when routing incoming calls to external numbers on the Phone tab. This allows the user’s mobile phone to be treated as a Wave station and ensures that calls forwarded to the user’s ViewPoint Mobile extension also appear in the user's Call Log in ViewPoint. |
| • | iPhone users. Configure the iPhone as a Wave mobile extension. |
| • | iPad or iPod Touch users. Configure the user’s associated phone as a Wave mobile extension. (Since these devices do not have voice capability, a separate phone—such as a cell phone—can be used.) |
See Using mobile extensions for externally routed calls.
If a user does not have a physical Wave phone
If a user does not have a physical Wave phone (in other words, a phone that rings when a call is received), calls to that user’s extension will automatically be forwarded to voicemail. That user will still be able to answer calls via the ViewPoint Mobile App on his or her mobile device, but the caller will probably already be leaving a message by the time the call is connected. This is similar to the way ViewPoint behaves when a user answers a call in the “Leaving Message” state in ViewPoint Desktop.
Changing the ViewPoint Mobile Port
You cannot specify the following ports, which are already in use:
21: File Transfer Protocol (FTP)
22: Secure Shell (SSH)
23: Telnet remote login service
25: Simple Mail Transfer Protocol (SMTP)
53: Domain Name Service (DNS)
80: Hypertext Transfer Protocol (HTTP)
110: Post Office Protocol (POP)
119: Network News Transfer Protocol (NNTP)
143: Internet Message Access Protocol (IMAP)
161: Simple Network Management Protocol (SNMP)
443: HTTP Secure (HTTPS)
5222: Wave’s own XMPP port
Important! Your firewall must allow outbound connectivity from the Wave on the port you specify. Most firewalls allow any outbound port connection, but some do not.
To change the ViewPoint Mobile Port
| 1 | Click the Administration tab of the Management Console. |
| 2 | Click General Settings, located in the General Administration section. |
| 3 | Click the System tab. |

| 4 | Enter the new ViewPoint Mobile Port to use. You can enter any number from 0 to 65535. You will receive an error message if you specify a port number that is already in use, or if the field is blank. Your firewall must allow outbound connectivity from the Wave on the port you specify. |
| 5 | Click Done to return to the Management Console. |
Setting processor core affinity for ViewPoint Desktop users
You can specify a processor core affinity setting that determines the physical processor on a user's PC on which ViewPoint Desktop runs, allowing ViewPoint Desktop users to take full advantage of the available processing power. You specify the processor affinity setting via the General Settings applet on the System tab.
This setting applies to all ViewPoint Desktop users.
Two settings are available:
| • | All Processors. Select this option (the default) to allow ViewPoint Desktop to run on any available processor. |
| • | Single Core. Select this option to force ViewPoint Desktop to run on the first physical processor. |
Important! Choosing Single Core may result in performance problems on a system running multiple ViewPoint Desktop sessions via Remote Desktop, because all of the sessions will run on the same physical processor. In this configuration, All Processors is a better option.
To set ViewPoint processor core affinity
| 1 | Click the Administration tab of the Management Console. |
| 2 | Click General Settings, located in the General Administration section. |
| 3 | On the System tab, select one of the following from the ViewPoint Desktop Core Affinity checkbox: |
| • | All Processors |
| • | Single Cor |

| 4 | Click Done to return to the Management Console. |
You add, edit and delete users in the Users view. To open the Users view:
| 1 | If necessary, click the Administration tab of the Management Console. |
| 2 | Click User/Group Management , located in the PBX Administration section of the Management Console. |
| 3 | Log on to the User/Group Management applet, which opens in a remote access window. Once you log on, the Users view opens. |
The Users view presents information about individual users and roles in your organization. Double-click a user in the view to edit that user.

Roles appear in bold in the Users view. For more information about roles, see Managing roles .
Each user that you add is displayed as a row in the Users view. The following table shows the information that is displayed for each user. You can sort by the information in any column by clicking the column header. If a column does not appear in your view, it is hidden. To show it, choose Tools > Columns. Select the appropriate view, and then check the columns you want to show.
|
Column |
Description |
|
Name |
User’s name. |
|
Extension |
Extension number dialed to reach the user. |
|
DID |
This feature is not supported in this version. |
|
Slot:Port / Mac Address |
Identification of the phone assigned to the user. |
|
Device Type |
The type of station, Analog, Digital, IP, or External. |
|
Type |
The type of user, User or Role (see Managing roles ). |
|
Agent |
If checked, the user is an agent in one or more Contact Center queues. See the Wave Contact Center Administrator Guide. |
|
Must Change Password |
If checked the user will be required to change his or her password the next time he or she logs in.
Note that this column is checked only if the field User must change password on next logon is checked for the user in the User dialog - Security tab. The column is not checked if the user’s password has expired. |
|
Password Never Expires |
If checked, the user’s password never automatically expires according to the system setting for automatic password expiration |
|
Locked Out |
If checked, the user is unable to log in to his or her account due to multiple failed attempts to access that account as defined in System Settings (see Enforcing strong password security). |
|
Title |
User’s title or department name. |
|
Organization |
The user’s Organization, if one has been assigned. You can set up Organizations that represent different companies within your office, and track users’ phone calls by Organization for billing or other purposes. |
|
Personal Status |
The name of the user’s current personal status. |
|
ACD DND |
This feature is not supported in this version. |
|
Mail Usage |
Percentage of allocated voicemail space currently used. For details on how the information in this and the following two columns is calculated, see Viewing the user’s disk usage . |
|
Greeting Usage |
Percentage of allocated greeting and voice title space currently used. |
|
Disk Usage (MB) |
Amount of disk space in megabytes used by the user's voice message, greeting, and voice title files. |
|
Mailbox Size (min) |
Total space allocated to the user for voice messages, in minutes. |
|
Greeting Size (min) |
Total space allocated to the user for greetings and voice titles, in minutes. |
|
Forwarding To |
Number to which the user is currently forwarding calls. |
|
Gateway Name |
This feature is not supported in this version. |
|
Listed |
If checked, the user is listed in the dial-by-name directory. |
|
Voice Title |
If checked, the user has a recorded voice title. You can record titles for users on the Recordings tab of the User dialog, or they can record their own. |
|
Announce Callers |
This feature is not supported in this version. |
|
Exchange Sync |
If checked, Wave and Microsoft Exchange voice messages and contacts are synchronized. |
|
Comments |
Comments about the user. |
Archiving a user’s voicemail and call recordings
You can manually archive a user’s voicemail and call recordings from the Users view. Archiving mailbox recordings can save space on your hard drive, especially if the mailbox contains call recordings. For an overview of mailbox archiving and instructions on setting up automatic archiving, see Archiving call recordings and voicemail.
To archive a user’s mailbox recordings from the Users view
| 1 | If necessary, click the Administration tab of the Management Console. |
| 2 | Click User/Group Management, located in the PBX Administration section of the Management Console. |
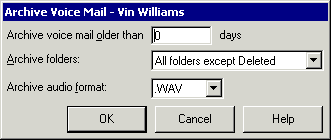
| 3 | From the Users view, choose Users > Archive Mailbox Recordings. The Archive Voice Mail dialog opens. |
| 4 | Set the following options: |
| • | Archive voicemail older than __ days. Enter a number of days. Voicemail older than that will be archived. |
| • | Archive folders. Select either Inbox only or All folders except Deleted. |
| • | Archive audio format. Select WAV or MP3. |
| 5 | Click OK to archive the user’s mailbox recordings according to the selections made. The recordings are archived in your default archive location (see Archiving call recordings and voicemail). |
Adding users via the User dialog
To create a new user, in the User/Group Management applet choose File > New > User. The User dialog opens.

Click in the left pane to select a tab in the User dialog. Click a  to expand a tab category. Many of the default settings in the User dialog tabs come from the default user template that you specify. For more about user templates, see Creating and updating users via a user template.
The following table provides an overview of the tabs, with a cross-reference to more detailed information.
|
Use this tab |
To specify |
See page |
|
User |
Basic user information, including name, extension, phone type and model, and password. Start here to create a new user. |
|
|
User \ Details |
Personal operator and other options. |
|
|
User \ |
Whether and under what circumstances Wave prompts the user to enter an account code for a call. |
|
|
User \ Call Log |
Whether the user’s calls are logged, and whether the user belongs to an Organization. |
|
|
User \ |
Personalized outbound Caller ID information, including a custom Caller ID for emergency calls. |
|
|
User \ Numbers |
User’s personal numbers. |
|
|
User \ VPN
|
User’s VPN credentials for use with ViewPoint Mobile Softphone and/or VPN phone. |
|
|
Voice Mail |
User’s voice mailbox size and features, including configuring WaveMail synchronization settings. |
|
|
Voice Mail \ Voice Mail \ Voice Mail \ |
Whether and how the user is notified of new voice messages by e-mail, page, or phone call. |
|
|
Voice Mail \ |
Cascading (repeated) notifications if a new voice message is not listened to or acted upon within a specified period of time. |
|
|
Phone |
Call waiting, Flash behavior, mobile extensions, and other phone options. |
|
|
Phone \ |
Call forwarding, if no answer, and if busy settings. |
|
|
Phone \ |
Configure analog, digital, and SIP phone feature buttons. This tab is called Features for an analog phone user. |
|
|
Phone \ |
Configure a DSS console device associated with a user’s digital phone to provide additional Line Appearance buttons representing user extensions. |
|
|
Phone \ |
Configurable ring tones for internal and external calls. |
|
|
Phone \ SIP |
Specify SIP authentication and registration settings for a user. |
|
|
Phone \ Softphone |
Enable a ViewPoint mobile softphone for the user. |
|
|
Phone \ Automatic Log Out |
Phone login behavior on other users’ phones. |
|
|
Phone \ Networking |
Set up OpenVPN Server or NAT traversal for a SIP phone user. |
|
|
Phone \ Wave Phonebook |
Configure the Edge 5000i Phonebook feature for an Edge IP phone user. |
|
|
Phone \ Spectralink |
Configure options for Spectralink phone users |
|
|
Audio |
Storage size for greeting and voice title files, and phone prompt language. |
|
|
Audio \ Hold Music |
Personalized hold music source. |
|
|
Audio \ Voice Title |
The user’s voice title. |
|
|
Audio \ Disk Usage |
Space usage report for voice messages, greetings, and voice titles. |
|
|
Security |
Password expiration control, and whether the user’s calls can be supervised. |
|
|
Security \ Permissions |
All user permissions, and the roles to which the user belongs. |
|
|
Queue \ Attributes |
Assign non-skill attributes (cost, custom attributes) to the user for call routing purposes. |
Wave Contact Center Administrator Guide |
|
Queue \ Skills |
For skill-based call routing, define a set of skills that you can then assign to the user. |
Wave Contact Center Administrator Guide |
|
Dial-by-name Directory |
Whether the user is listed in the Wave dial-by-name directory. |
|
|
ViewPoint |
ViewPoint application options, including custom call alert settings. |
|
|
Sharing \ Sharing \ Call Log, Sharing \ Contact, Sharing \ Message |
If and how any of the user’s folders are shared with other users. |
You use the User tab to identify a user, assign an extension, create a password, and specify the user’s phone type and model.
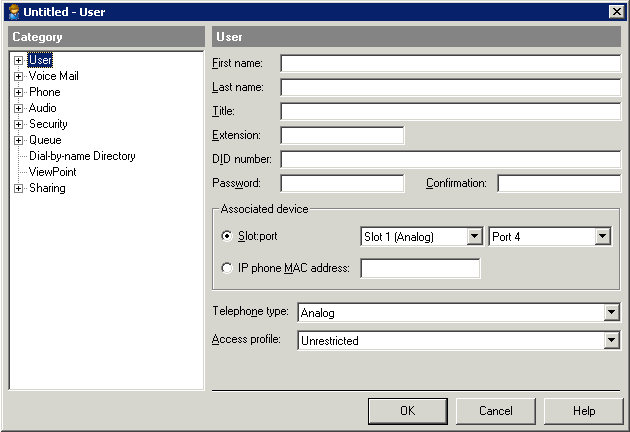
You can add a new user quickly via the User tab. When you add a new user, the only required fields are Last name, Extension, and Password/Confirmation. You can create a new user with only this information provided, then edit the users at a later time to customize the user’s profile.
To add a new user via the User tab
| 1 | In the User/Group Management applet, choose File > New > User, then click User in the left pane. |
Identifying the user
| 2 | Required: Enter the user’s First name (up to 64 characters) and Last name (up to 30 characters). |
| 3 | Optionally, enter the user’s Title (up to 30 characters) that you want to be displayed along with the user name in the User view. |
You can use the Title field for various purposes, for example for the user’s department. When a caller requests to be transferred to someone in Sales, the Operator can see all the users in the Sales department grouped together in ViewPoint’s Transfer Call dialog. You can also use ViewPoint Groups to group users by department (see About public and personal ViewPoint Groups).
| 4 | Required: Enter the user’s Extension. A user’s extension is the number callers dial to reach the user. Extensions must comply with the following restrictions: |
| • | Must match the First Digit rules for length and digits allowed |
| • | No longer than 10 digits |
| • | Numeric characters only |
| • | Must be unique |
Note: Extension 8888 is reserved and cannot be assigned to an individual user. Extension 8888 is reserved for the “send message to all users” feature. If a user enters extension 8888 when sending a voice message from his or her phone, the message is automatically sent to all users who have a voice mailbox configured.
In addition, follow these recommendations when assigning extensions:
| • | Avoid extensions that begin with another extension or access code. For example, if one user is given extension 17 and another extension 177, users who dial extension 17 will experience a brief delay while Wave waits to see if another “7” is dialed. |
| • | Avoid extensions that begin with the same number used for an auto attendant menu choice. Slow dialers may be unable to dial the extension at the auto attendant, because they will activate the menu choice instead. See Creating a new auto attendant. |
| • | Avoid extensions that begin with frequently dialed area codes—if users forget to dial an access code, they may unexpectedly dial the extension instead. For example, if 1-617 is a commonly dialed prefix for your location, do not assign extension 161. |
Creating a password
| 5 | Required: Enter a numeric Password used to access the user's voicemail and account options, and to log on to ViewPoint. The user’s password can be changed either on this tab or in ViewPoint. |
Retype the new password in the Confirmation field.
Note: Assigning secure passwords is one of the key means by which you can protect your business from unauthorized access, and lost money due to toll fraud. See Protecting Your Phone System Against Toll Fraud.
To set password requirements for the system such as minimum password length, click Tools > System Settings to use the Recommended minimum password security settings.
Specifying a phone type and model
| 6 | Specify the user’s phone type and model: |
| • | Slot:port: |
| • | For an analog or digital phone user, select the appropriate slot and port for the user's phone. (You can also assign a digital phone port to a user automatically when you connect the phone as described in Assigning a user from a digital phone.) |
| • | For an IP phone user, this field is not used. |
| • | For a user at a remote location or a cell phone user, select No slot selected and No port selected from the drop-downs. |
| • | IP phone MC address: |
| • | For an analog or digital phone user, this field is not used. |
| • | For an IP phone user, select the IP phone MAC addresscheckbox and then enter the MAC address of the user’s IP phone. Select the phone's model from the Telephone type drop-down as described in the next step. When you plug the phone into the network, it will go to Wave and pull down the settings for this associated user. |
| • | For a soft phone user, you must select IP phone MAC address for a softphone user, even though this setting does not apply to them. (This is due to a known issue that will be addressed in a future version,) Enter any 12-digit string in the text box—for tracking or reference purposes, you can enter the MAC address of the user's primary PC that will be running the softphone. |
| 7 | To specify the user's Telephone type, select one of the following from the drop-down: |
| • | For all analog phone users, select Analog. |
| • | For a digital phone user, select the appropriate model for the user, for example "Digital Edge 700-24". |
| • | For an IP phone user, select the appropriate model for the user, for example "IP Edge 5000i-LLCDG". |
| • | IP Polycom Soundstation Conference Phone |
| • | IP Spectralink Wireless Phone |
| • | If the Spectralink phone will be dedicated to one user (this is the typical operation mode), the phone's IP Phone Mac Address that you entered in the previous step will be used. |
| • | If the Spectralink phone will be used by multiple users with individual extensions, select the Log In to Device checkbox. (Since no IP phone MAC address is needed in this configuration, that field is disabled.) End-users will be prompted by the phone to log in with their individual extension and password. |
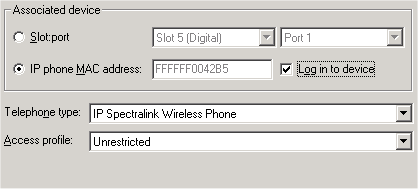
For details about other Spectralink options that you can set for the user, see The Phone \ Spectralink tab .
| • | For a softphone user, select one of the following: |
| • | IP Third Party SIP Telephone—Select to use a third party SIP phone as the user's primary phone. |
| • | ViewPoint Desktop Softphone—Select this option to use the ViewPoint Desktop softphone as the user's primary phone. (If this user will use the Viewpoint Desktop softphone as a secondary phone, select the user's actual physical phone mpdel here.) |
| • | ViewPoint Mobile Softphone—Select to use the ViewPoint Mobile integrated mobile SIP softphone as the user's primary phone. |
The list of access profiles displayed here is set up in the Outbound Routing applet. See Configuring specific access profiles.
| 9 | Click OK to save the new user with the current settings, or continue configuring the user via the other tabs of the User dialog. |
Assigning a user from a digital phone
You can assign a digital phone to a user automatically when you connect the phone.
To assign a user from a digital phone
| 1 | Create the user as described in The User tab. Be sure to specify the following: |
| • | Set Slot:port to No slot selected and No port selected. |
| • | Select the digital phone model number of the phone to be assigned to this user from the Telephone type drop-down list. |
| 2 | Connect the phone to a digital phone port on the Wave Server. |
| 3 | If the phone was previously set up and plugged into a different port, the phone will display Previous <Ext> Keep?. |
| • | If you are moving the phone but still want to keep it assigned to the same user, select Yes. Go to step 5. |
| • | To assign the phone to a different user, select No. |
| 4 | Press BEGIN. The phone displays a list of users who do not yet have a phone assigned, and whose Telephone type field matches the phone’s. Scroll through the list and select the user to assign to the phone. |
| 5 | Press Select to choose the user to assign to the phone. |
| 6 | Press Yes to confirm the new phone assignment. |
You use the User \ Details tab to enter descriptive comments and other information about the user.

On the User \ Details tab, use the Comments field to enter descriptive comments about the user as needed.
Setting up a personal operator
By default, Wave dials the Operator user’s extension whenever a caller presses 0 while listening to a user's greeting or leaving a message.
To transfer calls to another user instead (for example, a departmental operator, personal assistant, or other auto attendant), select the user to whom you want to transfer calls from the Operator drop-down list on the User \ Details tab. For more information about operators, see The Admin user. A personal operator can be also be set in ViewPoint.
Entering the user’s Microsoft Windows NT account
On the User \ Details tab, in the NT account field enter the user’s Windows network account name, for example, MAIN\MAnatolia or WORKGROUP\John. This field is primarily for use by Add-ins and Client API developers.
You use this tab to specify whether Wave will prompt this user to enter account codes. Account codes are digits that users can enter to accompany each call that can then be used for billing or tracking purposes.
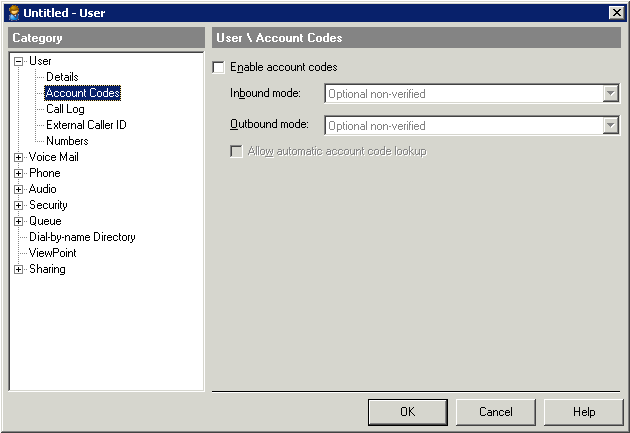
You set account code behavior separately for inbound and outbound calls. For outbound calls, you can handle account codes differently for long-distance calls vs. local calls.
You can also specify whether entered account codes are verified against a list of valid account codes that you create (as described in Creating a valid account code list). Note that if you select one of the “verified” options, Wave will reject invalid account codes until a valid one is entered.
For more about how account codes are used in Wave, see Using account codes.
To configure the user’s account code settings
| 1 | In the User/Group Management applet, in the Users view create a new user or double-click an existing user to edit the user. |
| 2 | On the User \ Account Codes tab, select the Enable account codes checkbox to enable account code processing for this user. |
| 3 | For Inbound mode, select one of the following settings to apply to inbound calls placed to this user. |
| • | Optional non-verified. Do not prompt the user to enter account codes. If the user enters an account code, accept it without verification. |
| • | Optional verified. Do not prompt the user to enter account codes. If the user enters an account code, verify it. |
| 4 | For Outbound mode, select one of the following settings to apply to outbound calls placed by this user. |
| • | Optional non-verified. Do not prompt the user to enter account codes on outbound calls. If the user enters an account code, accept it without verification. |
| • | Optional verified. Do not prompt the user to enter account codes on outbound calls. If the user enters an account code, verify it. |
| • | Forced non-verified - All calls. Prompt the user to enter an account code on all outbound calls, if one has not already been entered. Accept the account code without verification. |
| • | Force verified - All calls. Prompt the user to enter account code on all outbound calls, if one has not already been entered, and verify it. |
| • | Forced non-verified - Long distance calls only. Prompt the user to enter an account code on all outbound long-distance calls, if one has not already been entered. Accept the account code without verification. |
| • | Force verified - Long distance calls only. Prompt the user to enter account code on all outbound long-distance calls, if one has not already been entered, and verify it. |
| 5 | Select the Allow automatic account code lookup checkbox to enable automatic association of account codes with contacts for this user. If checked, the user can enter an account code for each contact, and the system automatically applies the account code to all subsequent calls to and from the contact. |
The User \ Call Log tab lets you define how the user’s calls appear in the Call Log in terms of which calls are logged, whether they are associated with an Organization, and what happens if the user logs onto another user’s station. For more information, see Using the Call Log view.
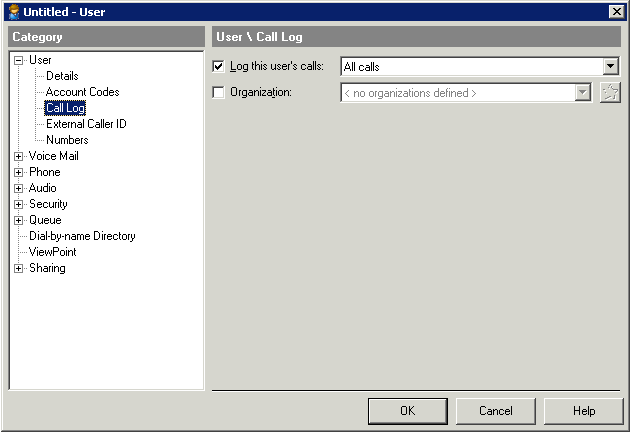
Determining which calls are logged
By default, all inbound and outbound calls made by the user appear in the Call Log. However, there are times when you might not want to log a user’s calls due to space or readability reasons, for example if the user’s station is connected to a fax server used for sending thousands of faxes daily.
To turn call logging on or off for the user
In the User/Group Management applet, in the Users view create a new user or double-click an existing user to edit the user.
| • | To turn off call logging for the user, on the User \ Call Log tab deselect the Log this user’s calls checkbox. |
| • | To specify which calls are logged for the user |
| • | Select the Log this user’s calls checkbox. |
| • | Select Only calls received, Only calls placed, or All calls from the drop-down list. |
Note the following:
| • | If you turn off call logging for a call center agent, you will not be able to run reports on the agent’s personal calls. Reports on queue calls and all statistics in the Queue Monitor are unaffected |
| • | Users with call logging turned off cannot use ViewPoint’s callback feature (File > Return Last Call) or the list of recently dialed calls on ViewPoint’s File menu. |
| • | If you have turned off internal call logging at the system level (see Setting Call Log options), the user’s internal calls will not be logged, regardless of this setting. |
Associating the user with an Organization
Organizations are a way to set up departments or multiple companies that share an office and a Wave Server. If you have created one or more Organizations, you can associate the user with the Organization to which he or she belongs. Calls that the user places or receives will be logged with that Organization showing in the Call Log’s Organization column.
See Using Organizations.
To associate the user with an Organization
| 1 | In the User/Group Management applet, in the Users view create a new user or double-click an existing user to edit the user. |
| 2 | On the User \ Call Log tab, select the Organization checkbox, and select an Organization from the drop-down list. |
If unchecked, the user’s calls will appear in the Call Log with the Organization column blank.
The User \ External Caller ID tab
By default, on outgoing calls all users send the external caller ID format specified in the General Settings applet (see Configuring system-wide Caller ID settings). The following steps are only necessary if you want to override the system-wide caller ID settings with a custom setting for a user, or specify an emergency caller ID for an off-site user.
Customizing caller ID
You can customize the caller ID number and name that accompany outbound calls placed by this user or phone. Note that the user can optionally make his or her own caller ID selection in ViewPoint, but cannot specify a different custom number or name—if the user selects Custom in ViewPoint, the caller ID number and name used are what you enter on this tab.
Setting emergency caller ID
Emergency caller ID can be critical for off-site users, because in the event of an emergency, a Public Safety Answering Point (PSAP) local to the user is notified, instead of one local to the Wave Server itself, which may be in a different geographical location.
You can specify a custom caller ID that is only used when this user or phone makes an emergency call. (An emergency call is an outbound call to an emergency number that has been programmed in the Outbound Routing / Special Digits table.)
On an emergency call, emergency caller ID overrides the caller ID that would normally be applied for this user (either the default system-wide caller ID specified in General Settings or a custom caller ID configured for a user or phone).
You can specify emergency caller ID on a per-user basis or via a user template to apply the setting to a group of users, for example all users at a satellite office.
Note: Custom emergency caller ID is not supported when hotdesking or hoteling—in either of these scenarios, the emergency caller ID of the phone's extension will always be used, not that of the logged-in user.
Warning! Verticaltakes no responsibility for the handling of emergency calls. Due to the number of variables involved, including specific carrier emergency calling implementations, proceed at your own risk.
Who should use this feature—and who should not
Before configuring emergency caller ID for a user, determine whether a single custom emergency caller ID is likely to identify a user’s correct calling location for all possible emergency calling scenarios. If not, do not configure emergency caller ID for the user.
Use custom emergency caller ID:
| • | For users who work at a single location, and who do not forward their calls to phones at other locations. |
| • | For users who use a mobile phone 100% of the time at the same location, for example retail employees who use a company mobile phone only while working in the store. |
Do not use custom emergency caller ID:
| • | If your carrier or ISP does not explicitly support the feature. |
| • | For ViewPoint Mobile users. |
| • | For users who work at multiple physical locations. |
| • | For users who forward their calls to phones at other locations, for example to a home phone after hours and on weekends. |
| • | For users who use a mobile phone 100% of the time in multiple locations—in the office, on the road, at customer locations, after hours at home, and so forth. These users should rely on the mobile phone’s own emergency call routing capabilities. |
| • | If you use cost-based or low-cost routing, because some routing decisions may cause an emergency call to be handled by a carrier that does not understand or support the feature. |
Requirements
| • | Carrier requirements: Before configuring custom emergency caller ID for any users, verify that your carrier or ISP understands and supports this feature, and that emergency calls will be routed to the correct PSAP. The notified PSAP must be able to determine the physical location of the phone number that you provide as emergency caller ID. |
| • | Phone and trunk requirements: Emergency caller ID can be used with all phone types and models, but only with SIP or T1/PRI trunks (analog trunks are not supported). |
Note that if your configuration includes centralized trunking, the emergency caller ID will be sent to the Wave Server where the trunks are located.
To configure user-specific external caller ID settings
| 1 | In the User/Group Management applet, in the Users view create a new user or double-click an existing user. |
| 2 | Click the User \ External Caller ID tab. |
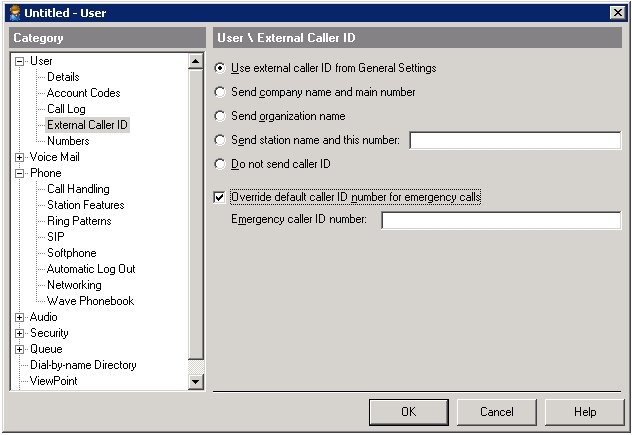
| 3 | Select an external caller ID setting: |
| • | Use external caller ID from General Settings. Sends the default settings configured in the General Settings applet. |
| • | Send company name and main number. Sends the company name and company main number as entered in the General Settings applet. |
| • | Send organization name. Sends the name of the organization to which the user has been assigned via User dialog \ Call Log tab. |
| • | Send station name and this number. Sends the phone’s station name display name as entered in the User Configuration (Templates) applet followed by the digits you enter here. Use this setting to provide the station name and number on outbound calls. |
| • | Do not send caller ID. Caller ID is not sent. |
| 4 | To specify emergency caller ID: |
| • | Select the Override default caller ID for emergency calls checkbox. |
| • | In Emergency caller ID number, enter a phone number whose location can be determined by the PSAP, for example the number of a landline or mobile phone. |
To test emergency caller ID
| 1 | Place a call to the emergency number from the user’s phone. |
| 2 | When the call is answered, tell the PSAP that you are a telecommunications worker testing emergency caller ID. |
| 3 | Ask the PSAP to verify the following: |
| • | The address from which the call was placed. |
| • | Which PSAP you have connected to. |
| • | Whether this PSAP is the one that serves the identified address. |
You use the User \ Numbers tab to view and edit the numbers that appear in the user’s “My Numbers” list in ViewPoint.
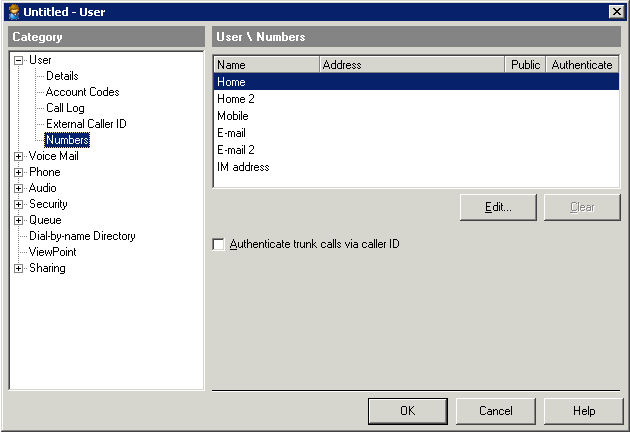
You also use this tab to enable automatic login for the user by authenticating one or more of the user’s numbers. When the user calls Wave from an authenticated number, he or she is automatically logged in without being prompted to enter an extension or password if automatic login is enabled for the called auto attendant. To enable automatic logon for an auto attendant, see Creating a new auto attendant.)
To enter or edit the user’s number
| 1 | In the User/Group Management applet, in the Users view create a new user or double-click an existing user to edit the user. |
| 2 | On the User \ Numbers tab, select the type of number you want to enter or modify, for example Home or Mobile, then click Edit. The Address dialog opens for the type of number that you selected. |
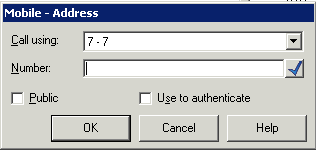
| 3 | If the Call Using field is present, select the dialing service to use when placing calls to this number. |
| 4 | In the Number, Address, Email, or IM address field, enter the phone number, IP address, email address or instant messaging address. |
| 5 | Select the Public checkbox to make the number publicly available. Public numbers act as follows: |
| • | Other users can quick-dial a public number (or make speed-dial shortcuts to them) by right-clicking the user’s name in their ViewPoint Extensions list. |
| • | When a call comes into Wave from a public number, the user’s name appears in the From column in the ViewPoint Call Monitor, and can be used to identify the user. |
Note that in cases where the same number is defined in different places, Wave chooses the name to display by prioritizing as follows: (1) a user’s public number, (2) a public contact, (3) a private contact.
| • | Other programs can access the number, for example, a ViewPoint Add-in that automatically dials certain numbers. |
If this checkbox is not selected, other programs cannot read or access the number.
Note: You can also authenticate an existing number by selecting it on the User \ Numbers tab and selecting the Authenticate trunk calls via caller ID checkbox.
| 6 | Select the Use to authenticate checkbox to enable automatic login for the selected number. If selected, whenever the user calls into Wave from this number via an auto attendant with automatic login enabled, he or she is automatically logged in without being prompted to enter an extension or password. |
| 7 | Click OK to return to the User dialog. To delete one of the user’s numbers, select it, then click Clear. |
You can use the User \ VPN tab to specify the user's VPN credentials.
You can also specify a user's VPN credentials via the user's supported phone, and this method is more secure, but it requires some extra effort on the part of the end user. See Specifying a user's VPN credentials for details about both methods and the security concerns involved.
The same VPN username and password are used whether the user uses the ViewPoint Mobile Softphone or a supported VPN phone, or both.
For more about Wave OpenVPN Server, see Using OpenVPN Server
Specifying a user’s VPN credentials via User/Group Management
Perform the following steps to specify a user’s VPN credentials. How you do so in step 2 depends on where the user’s phone is located:
| • | In network: The user’s phone is located inside the same LAN as the Wave Server, behind the firewall. Wavewill automatically generate a user name and password for each user. |
Important! For easiest configuration, phones should be inside the LAN for initial deployment.
| • | Not in network: The user’s phone is located outside of the LAN. |
To enter the user’s VPN credentials via User/Group Management
| 1 | In the User/Group Management applet, in the Users view create a new user or double-click an existing user to edit the user. |
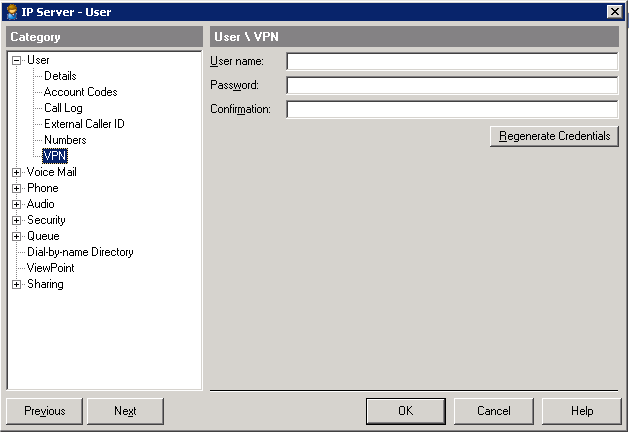
| 2 | On the User \ VPN tab, do one of the following: |
| • | In network: Click Regenerate Credentials to generate the user’s VPN credentials, which will be automatically downloaded to the user’s ViewPoint Mobile Softphone and/or supported IP phone. |
| • | Not in network: Enter a Username and Password manually, then make a note of the password so that the user can enter it on his or her the phone. |
Alternatively, the user can configure his or her phone according to the steps in “Configuring VPN on a user’s IP phone” in Chapter 3 in the Wave OpenVPN Server Guide, and tell you the password that was entered so that you can update the field here.
| 3 | Click OK to save your changes. |
You use this tab to configure various voice mailbox options for the user.
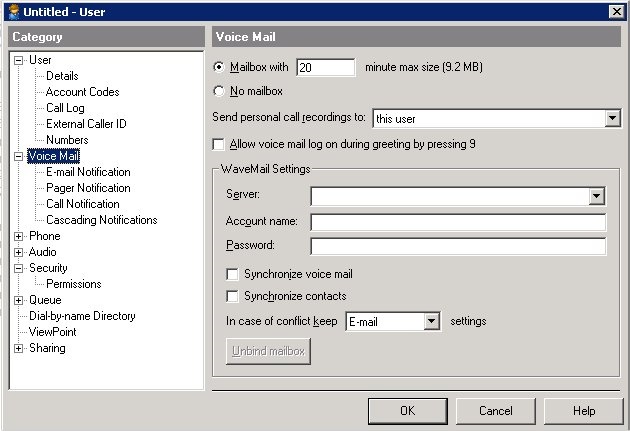
Configuring the user’s voice mailbox
On the User \ Voice Mail tab, in Mailbox with __ minute max size, enter the maximum size of the mailbox, in minutes. Mailboxes can be as large as 999,999 minutes (447 GB).
Choose the default setting of 20 minutes (9.2 MB of storage) for typical users. You may need to increase the default for users who record calls, because call recordings (including those that were e-mailed to the user) are stored in the user's mailbox.
Note: Voice messages take up disk space on the Wave Server computer. Once available disk space becomes scarce, system performance will suffer. To avoid this problem, archive your users’ voice messages and call recordings regularly. See Archiving call recordings and voicemail.
To create an extension without a voice mailbox—for example, a conference room or fax machine—click No mailbox.
Choosing the mailbox for call recordings
By default, call recordings that the user makes manually from ViewPoint’s Call Monitor are sent to the mailbox of the user who made them. To send personal recordings to another user’s mailbox instead, on the User \ Voice Mail tab select a name from the Send personal call recordings to drop-down list.
Note: This field applies only to call recordings manually made by the user. The destinations for automatic call recordings made by the system and by queues are set separately. See Recording all calls
Enabling voicemail greeting logon
By default, users can log on to their Wave accounts from a Wave station or auto attendant only. You can also allow this user log on by pressing 9 during the voicemail greeting. (In this case, the user is prompted only for password.) If you do not use auto attendants, you should enable this feature for all users, because it is the only way for them to access their accounts remotely. To enable the feature, select the Allow voicemail log on during greeting by pressing 9 checkbox.
Note: Voicemail greeting logon can be slightly less secure than auto attendant logon, because the caller does not need to know the extension number. If you enable voicemail greeting logon, you should enforce secure passwords. See Enforcing strong password security.
WaveMail can optionally synchronize a user’s voice messages or contacts (or both) between Wave and the user’s e-mail program. WaveMail then allows the user to:
| • | Receive, listen to, and manage voice messages from either Wave or the user’s e-mail program. |
| • | Share and maintain a single set of contacts between Wave and the user’s e-mail program. |
For more information, see Using WaveMail to syncronize users' Wave contacts and voice messages with their e-mail program
The Voice Mail \ E-mail, Pager, and Call Notification tabs
You can have Wave notify a user by e-mail, page, or phone call whenever he or she receives a new voice message. This powerful feature enables users to keep abreast of their Wave voicemail no matter where they are. Notification messages include important details about the call, and give users quick access to hearing the message and responding to it. You have notifications sent for all voice messages or for Urgent messages only. You can also have notifications sent only at certain days or times. Notifications are sent only for new voice messages, not new call recordings that arrive in a user’s Inbox.
Users can also configure notifications in ViewPoint.
Note: Paging and call notification will not work with access codes that route over PRI trunks unless you make configuration changes. See Enabling trunks for external pager and call notifications for details.
The following information is attached to notifications of each type, making them a powerful tool for voicemail management, even at a remote location.
E-mail notifications can contain:
| • | Caller’s name |
| • | Phone number at which the call originated |
| • | Wave extension at which the message was left |
| • | Voice message length |
| • | Notes associated with the message |
| • | Voice message as a WAV file attachment |
Pager notifications can optionally contain:
| • | Caller ID for message |
| • | Wave extension that was dialed |
| • | Voice message length |
Call notifications contain:
| • | Voice title of the user who received the message |
| • | Voice title or recorded name of the person who left the message, if available |
| • | Identification of urgent messages |
| • | Length of the voice message |
| • | Ability to press # right from the call and hear the message, then press 43 to call them back. |
Note: You can use call notifications to log onto your account from a remote location and have Wave pay for the call rather than your remote phone. See the Wave ViewPoint User Guide.
Determining which voice messages send notification
For each notification type—e-mail, pager, and call—you can specify how often notifications are sent:
| • | Do not send notifications. The user does not receive notification of new voice messages. |
| • | Send notification for all messages. The user receives a notification whenever new voice messages arrive. |
| • | Send for Urgent messages only. The user receives a notification whenever voice messages marked Urgent arrive. |
E-mail notification for missed calls and voice messages
For e-mail notifications only, you can also send notifications for all missed calls and messages. This option allows you to follow up on calls where the caller hangs up before or while listening to the prompt to leave a voice message with his or her name and phone number. The e-mail notification will say "Abandoned call from <calleridname>, <calleridnumber>".
Before setting up e-mail notification for a user, make sure e-mail notification is configured properly on the Wave Server, as described in Enabling e-mail notification
To set up e-mail notification
| 1 | In the User/Group Management applet, in the Users view create a new user or double-click an existing user to edit the user. |
| 2 | Click the Voice Mail \ E-mail Notification tab. |
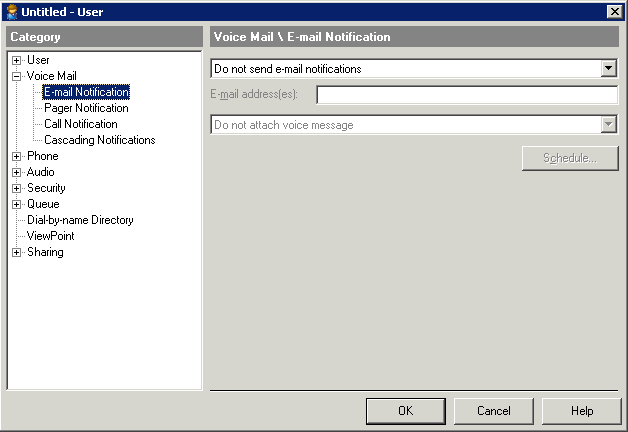
| 3 | Select whether e-mail notifications occur, and if so, how often: |
| • | Do not send e-mail notifications. The user does not receive notification of new voice messages. |
| • | Send e-mail notification for all messages. The user receives a notification whenever new voice messages arrive. |
| • | Send for Urgent messages only. The user receives a notification whenever voice messages marked Urgent arrive. |
| • | Send e-mail notification for all missed calls and messages. This option allows the user to follow up on calls where the caller hangs up before or while listening to the prompt to leave a voice message with his or her name and phone number. The e-mail notification will say "Abandoned call from <calleridname>, <calleridnumber>". |
| 4 | In the E-mail address(es) field, enter the e-mail address to which notifications are sent. Separate multiple addresses by semicolons (;). |
Note: If using SMTP, valid e-mail addresses must be in the format of user@company.com. If using MAPI, e-mail addresses must be resolvable via the Microsoft Outlook address book.
| 5 | In the next drop-down list, choose whether the voice message is attached to the e-mail as a WAV file, by selecting one of the following: |
| • | Do not attach voice message. The voice message is not attached to the e-mail. |
| • | Attach voice message. Messages are attached to the e-mail and also appear in the user’s Wave Inbox marked as unheard. |
| • | Attach voice message and mark as already heard. Messages are attached to the e-mail and appear in the user’s Inbox marked as already heard. |
| • | Attach voice message and delete from Inbox. Messages are attached to the e-mail only, and do not appear in the user’s Wave Inbox. |
To set up pager notification
| 1 | In the User/Group Management applet, in the Users view create a new user or double-click an existing user to edit the user. |
| 2 | Select the Voice Mail \ Pager Notification tab. |
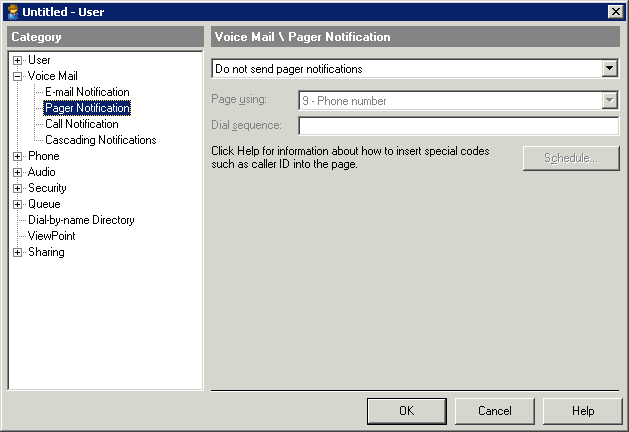
| 3 | Select whether pager notifications occur, and if so, how often: |
| • | Do not send pager notifications. The user does not receive notification of new voice messages. |
| • | Send pager notification for all messages. The user receives a notification whenever new voice messages arrive. |
| • | Send for Urgent messages only. The user receives a notification whenever voice messages marked Urgent arrive. |
| 4 | In the Page using field, select the dialing service that you want Wave to use to dial the user’s pager. |
| 5 | In the Dial Sequence field, enter the dial string for the pager, including the phone number of the paging service and the pager's PIN if required. The dial string can contain any touch tone digit (0-9, *, #). You can also enter a comma to indicate a 2-second pause in the dial sequence. |
You can also use the following special characters to add information to the page:
| • | I or i sends the Caller ID number (for an external call) or Wave extension (for an internal call). |
| • | E or e sends the Wave extension that the caller dialed. |
| • | L or l sends the length of the voice message in seconds. |
For example, the dial sequence 18007771000,,,1245983#E causes Wave to dial the paging service, pause for 6 seconds, enter the pager’s PIN (1245983) followed by # to indicate end-of-PIN, enter your extension (where the voice message was left), and then hang up. In this example, your pager displays only the extension number.
If users receive only the last portion of the pager data specified, there are not enough pauses between the pager number and the information. If this problem occurs, add more commas (each of which represents a 2-second pause.)
Note: Do not enter multiple stars (*) in a row in the pager string. Use only one star to send a dash. Multiple consecutive stars can terminate the page message.
To set up call notification
| 1 | In the User/Group Management applet, in the Users view create a new user or double-click an existing user to edit the user. |
| 2 | Select the Voice Mail \ Call Notification tab. |
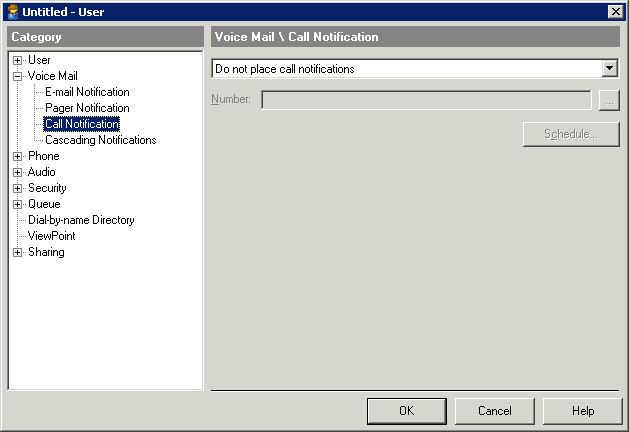
| 3 | Select whether call notifications occur, and if so, how often: |
| • | Do not place call notifications. The user does not receive notification of new voice messages. |
| • | Send call notification for all messages. The user receives a notification whenever new voice messages arrive. |
| • | Send for Urgent messages only. The user receives a notification whenever voice messages marked Urgent arrive. |
| 4 | Click  in the Number field to open the Call Notification Number dialog. in the Number field to open the Call Notification Number dialog. |
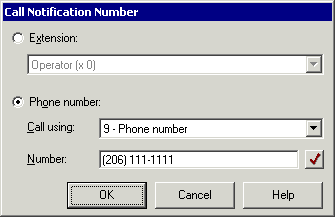
| 5 | Choose one of the following options: |
| • | Click Extension and select an extension from the drop-down list. |
| • | For an external number, use the Call Using drop-down list to select the access code and dialing service to use when placing notification calls. Then enter the number to dial in Number, exactly as it should be dialed. |
| 6 | Click OK. |
If you do not want to receive notifications 24 hours a day, 7 days a week, you can schedule notifications to occur at specific times only. For example, you can have Wave send notifications only during business hours or after business hours on work days. You can also set up custom hours. You can create different schedules for e-mail, pager, and call notification. Notifications can also be scheduled in ViewPoint.
Note the following:
| • | When you turn notification on for a user, by default Wave sends notifications 24 hours a day, 7 days a week. If this is what you want to do, you do not need to schedule notifications. |
| • | Notifications are never queued for later delivery. When you use a schedule, voice messages that arrive during an unscheduled time do not produce notifications at all. |
A schedule contains individual schedule entries. For example, if you want a user to be notified of new voice messages during business hours and all day on holidays, you would add a schedule entry for “during business hours” and another schedule entry for “on holidays.” You (or users) can define custom schedule entries for even greater precision.
You can enable or disable each schedule entry as needed. For example, if you do not want a user to be paged during a specific upcoming holiday, disable the schedule entry for “on holidays.” You can enable it after the holiday has passed.
Defining a schedule for notifications
After setting the options in the e-mail, pager, or call section on the Notifications tab, click Schedule in the appropriate section to define a schedule for notification. The Schedule (E-mail/Pager/Call) Notifications dialog opens. The Schedule button is unavailable until you have created notification settings on the Notifications tab.
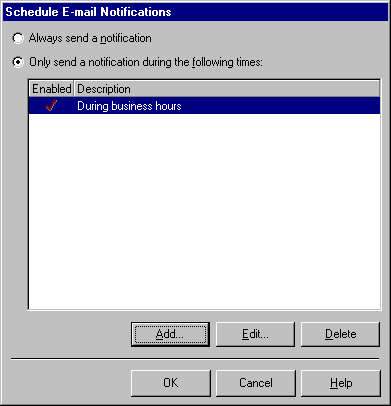
The Schedule Notifications dialog lists the schedules that have been defined so far, if any. Click one of the following:
| • | Always send a notification. The schedule entries in the list (if any have been created) are ignored, and the user receives notification of new voice messages at all times. |
| • | Only send a notification during the following times. The user receives notification only during the times specified in the schedule entries that appear in the list with a check mark in the Enabled column. |
| 1 | To add a schedule entry, click Add. The Schedule Notification dialog opens. |
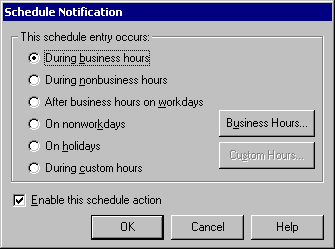
| 2 | To view or change the business and holiday hours used for scheduling, or to create other sets of business hours, click Business Hours. See Setting business hours. |
| 3 | Under This schedule entry occurs, choose one or more of the following time periods during which you want to notify the user of new voice messages. For purposes of illustration, each of the time periods in the following list show in parentheses what would be the result of selecting that time period in a company whose business hours are Monday through Friday, from 9:00 a.m. to 5:00 p.m. |
| • | During business hours. Notifications are sent during business hours, Monday through Friday, from 9:00 a.m. to 5:00 p.m. |
| • | During nonbusiness hours. Notifications are sent at all times other than business hours, including early mornings, evenings, weekends, and holidays. Notifications are sent Monday through Friday, 5:01 p.m. to 8:59 a.m., and on Saturdays, Sundays, and holidays. |
| • | After business hours on workdays. Notifications are sent Monday through Friday, 5:01 p.m. to 8:59 a.m. |
| • | On nonworkdays. Notifications are sent on Saturdays and Sundays. |
| • | On holidays. Notifications are sent on holidays. See Setting business hours. |
| • | During custom hours. Notifications are sent during specific days and hours independent of the business and holiday hours already defined. See Setting up custom hours. |
| 4 | Be sure to check Enable this schedule action, and then click OK. Now the schedule in the Schedule Notifications dialog includes the schedule entry you just created. Add more schedule entries as needed, and then click OK when you are finished. |
You can define custom hours that are not related to your office’s business hours and holidays and use them to schedule notifications, auto attendant actions, and routing list actions. Custom hours are specific to the user, auto attendant, or routing list for which you create them. That is, the custom hours you set up for a user do not apply automatically to other users. Custom hours for a user can also be set up in ViewPoint.
When setting custom hours, you can enter dates and times in most formats—they are converted to a standard format based on your Windows regional settings.
To set up custom hours
| 1 | Click Custom Hours in either the Schedule Notification dialog (for users) or the Schedule Action dialog (for auto attendants). The Custom Hours dialog opens. |
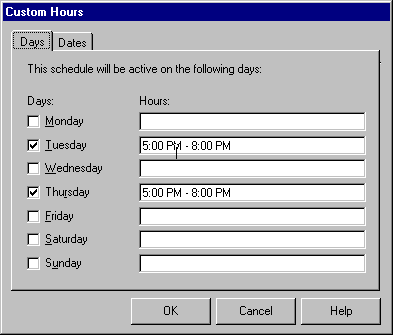
| 2 | On the Days tab, check each day of the week for which you want the custom schedule to be active. If you leave the Hours field blank for a selected day, the entire day is included in the custom schedule. To include only part of a day, enter starting and ending hours. |
Note: You can enter multiple time ranges separated by commas, for example, “9:00 AM - 12:00 PM, 3:00 PM - 6:00 PM.”
| 3 | On the Dates tab, click Add if you want to apply the custom schedule to a specific date. |
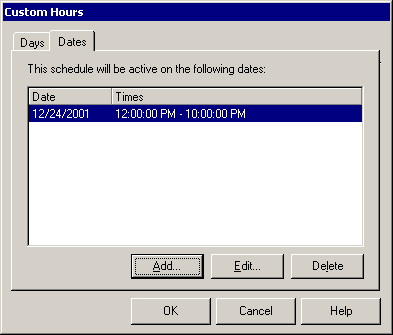
| 4 | In the Custom Date dialog that opens, enter the Custom date, and then click All day or Partial day. For a partial day, enter starting and ending times. |
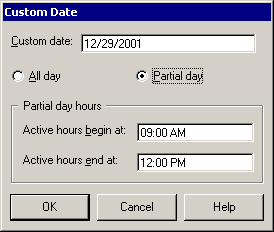
| 5 | Click OK to add the custom date to the list on the Dates tab of the Custom Hours dialog. |
The Voice Mail \ Cascading Notifications tab
You use the Cascading Notifications tab to configure repeated (“cascading”) notifications if this user receives a new voice message and does not listen to or act on it within the period of time that you specify. IT staff or medical personnel in particular may need to rely on cascading notifications when it is critical that voice messages are listened to and handled within a specific period of time.
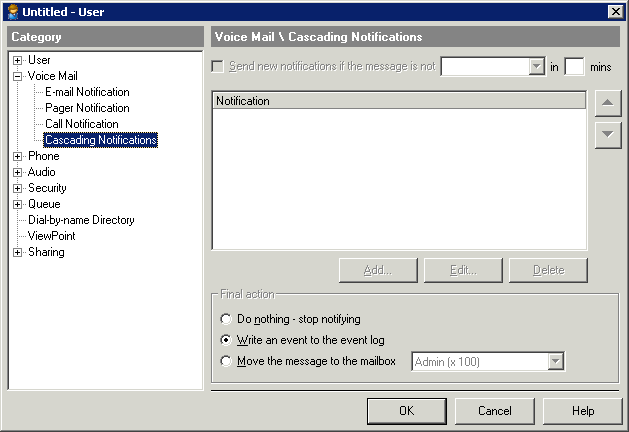
Cascading notifications supplement the standard voice mail notification feature, which sends a single notification for each type selected (e-mail, pager, or call notification).
Note: In order to configure cascading notifications for a user, the user must have at least one type of voice mail notification (e-mail, pager, or call) set, and the user must have a voice mailbox. If these requirements are not met, the options on this tab are disabled.
To set up cascading notifications for the user
| 1 | In the User/Group Management applet, in the Users view create a new user or double-click an existing user to edit the user. |
| 2 | Click the Cascading Notifications tab. (The options on this tab are disabled if you have not set at least one type of voice mail notification for the user.) |
| 3 | Select the Send new notifications checkbox. |
| 4 | Complete the statement as follows: |
| • | if the message is not ___. Select one of the following actions from the drop-down list: |
| • | marked as heard. Cascading notifications will be sent if the user does not listen to the new voice message. |
| • | saved or deleted. Cascading notifications will be sent if the user does not act on the new voice message by saving or deleting it. |
| • | in ___ mins. Enter the number of minutes to wait for the action to occur. |
| 5 | Click Add to create a new cascading notification, or Edit to modify the selected notification. The Cascading Notification Rule dialog opens: |
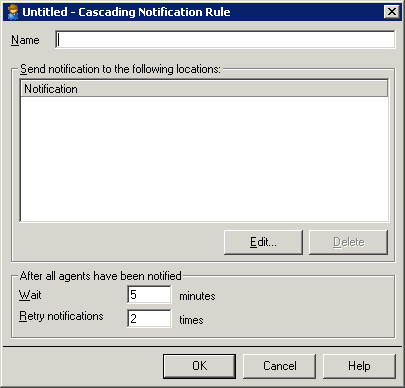
| 6 | Enter the following information: |
| • | Name. Name of this set of cascading notifications. |
| • | Send notification to the following locations. Lists each individual notification type and target that has been defined so far in this set of cascading notifications. |
| 7 | Click Edit to identify the specific e-mail, pager and call notification settings that make up this set of cascading notifications. The Notification dialog opens: |
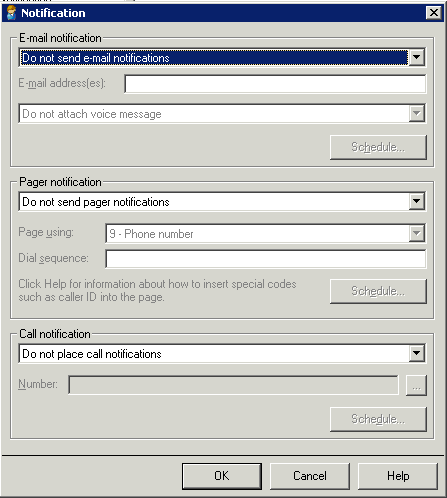
For an explanation of how these fields work, see:
| • | Setting e-mail notification |
| • | Setting pager notification |
| • | Setting call notification |
| • | Scheduling notifications |
| 8 | Click OK to return to the Cascading Notification Rule dialog. |
| 9 | In the After all agents have been notified section, define what happens if all of the individual notifications listed here have been sent and the voice message has still not been listened to or acted upon. |
| • | Wait ___ minutes. Enter the number of minutes to wait before: |
| • | Retrying the individual notifications listed above (specify the number of times to repeat below). |
| • | Trying the next notification (if any) listed in the Cascading Notifications tab. |
| • | Performing the final action specified in the in the Cascading Notifications tab (see below for instructions). |
| • | Retry notifications ___ times. Enter the number of times to repeat the individual notifications listed above before trying the next notification (if any) or performing the final action. Enter 0 if you want to make one attempt of the individual notifications listed above with no retries before trying the next notification or performing the final action. |
| 10 | Click OK to return to the Cascading Notifications tab. When you click OK, a new cascading notification is added to the list of those that have been created so far. Cascading notifications will be performed in the order listed. Use the Up and Down arrows to rearrange the list order. |
| 11 | Select one of the following final actions to perform if all of the cascading notifications defined here have been sent and the voice message has still not been listened to: |
| • | Do nothing - stop notifying. |
| • | Write an event to the event log. Depending on how your Event Log is configured, this may result in a Wave system administrator being notified of the event via e-mail. |
| • | Move the message to the mailbox. Select the voice mailbox where the voice message will be sent from the drop-down list. Note that depending on that voice mailbox owner’s own notification settings, another sequence of cascading notifications may be initiated. |
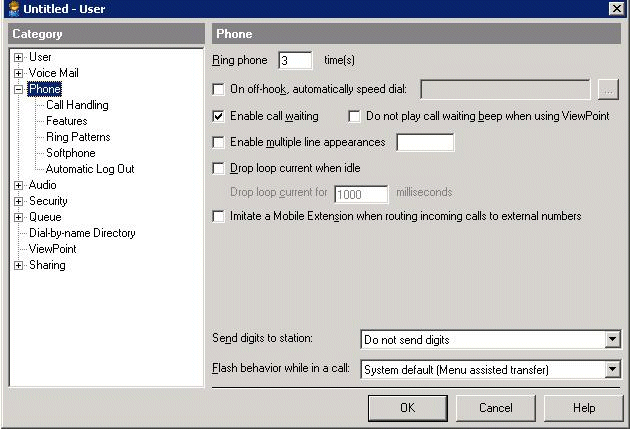
You use the Phone tab to configure basic options for the user’s phone. The options available on this tab vary depending on the phone type (analog, digital, or SIP). The following graphic shows the Phone tab for an analog phone user.
Setting the number of rings for the phone
To set the number of rings for the user’s phone
| 1 | In the User/Group Management applet, in the Users view create a new user or double-click an existing user to edit the user. |
| 2 | On the Phone tab in the Ring phone __ times field, enter the number of times to ring the user’s extension before proceeding to the next action in the user’s routing list. |
Having the phone automatically dial when taken off hook
To have the user’s phone automatically dial when taken off hook
| 1 | In the User/Group Management applet, in the Users view create a new user or double-click an existing user to edit the user. |
| 2 | On the Phone tab, select the On offhook, automatically speed dial checkbox, and then click  to open the Speed Dial dialog. to open the Speed Dial dialog. |
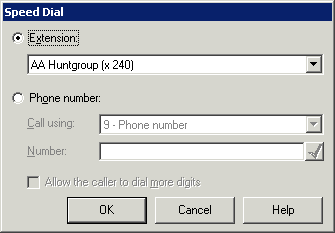
| 3 | Select one of the following: |
| • | Extension. Select the extension to speed-dial from the drop-down list. |
| • | Phone Number. Select this option to speed-dial an external number and/or access code. Enter the following information: |
| • | Call using. Select the dialing service for Wave to use to speed-dial the external number. You can also supply just the access code for an external call, so that the user can place external calls without having to dial the access code (see Allow the caller to dial more digits field, below). |
| • | Number. Specify the external number. If you supplied only the access code for an external call in Call using as described above, leave this field blank. |
| • | Allow the caller to dial more digits. Select this checkbox when you specify just an access code in the Call using field. This allows the user to place external calls without dialing the access code. Note that if you configure this feature this way, in order to dial an internal number from this phone, the user must pick up the phone and press Flash to get internal dial tone. |
Leave this checkbox unselected to automatically dial the Number as entered, without the user being able to enter additional digits.
To provide call waiting on the user’s phone
| 1 | In the User/Group Management applet, in the Users view create a new user or double-click an existing user to edit the user. |
| 2 | On the Phone tab select the Enable call waiting checkbox. |
If unchecked, when the user is on a call new calls go straight to voicemail without playing the call waiting beep.
| 3 | If the user uses ViewPoint’s Call Monitor folder to spot incoming calls, and thus does not want the audible beep over the phone, check Do not play call waiting beep when using ViewPoint. |
Note that the ability to enable the Call Waiting feature varies depending on phone type.
| • | Analog phones. By default, the Enable call waiting checkbox is selected and the Do not play call waiting beep when using ViewPoint checkbox is not selected. |
| • | Digital phones. Both the Enable call waiting checkbox and the Do not play call waiting beep when using ViewPoint checkbox are disabled, until a Call Waiting feature button is configured on the phone. Then, the default settings are the same as for analog phones. |
| • | SIP phones. Unless the SIP phone supports call waiting natively, neither checkbox appears in the User dialog. Currently only the 9112i and 51i SIP phones support call waiting natively. For these phones, the default settings are the same as described for analog phones. |
Note: If you set call waiting options via a user template, the template may be applied later to a user whose phone type does not support call waiting. In this scenario, call waiting settings will not be applied to those users, as indicated by the note on the Phone tab of the User templates dialog:
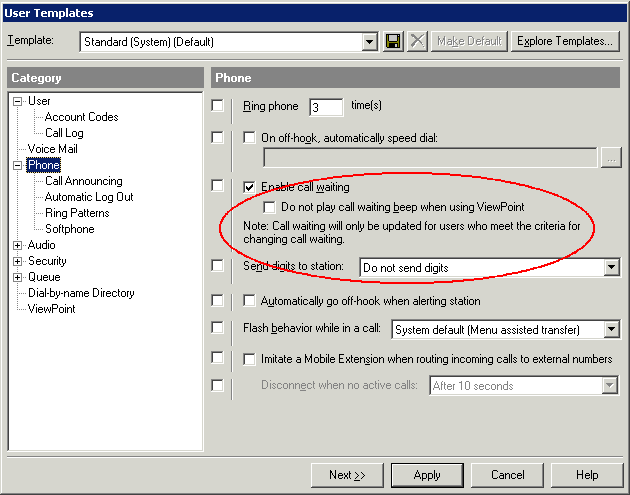
Enabling multiple line appearances on an analog phone
To enable multiple line appearances on an analog phone
| 1 | In the User/Group Management applet, in the Users view create a new user or double-click an existing user to edit the user. |
| 2 | On the Phone tab, select the Enable multiple call appearances checkbox. |
| 3 | Enter the number of extra lines available to this user. |
| • | Both checkboxes unselected. The user has one line. If the user is on the phone, new incoming calls go straight to the next step on the user’s routing list. The user never hears a call waiting beep. |
| • | Enable call waiting selected, Enable multiple line appearances unselected. Standard call waiting. The user has two lines, one for the current call, and one for the “call waiting” call. Once both lines are in use, new incoming calls go straight to the next routing list step with no call waiting beep. |
| • | Enable call waiting unselected, Enable multiple line appearances selected. The user has the number of lines that you specify. When the user is on the phone, he or she hears the call waiting beep and can press Flash to accept incoming calls until all the lines are in use. Only when all the lines are in use do new incoming calls go straight to the next routing list step with no call waiting beep. |
| • | Both checkboxes selected. The user has an infinite number of lines. New calls always trigger call waiting and never go straight to the next routing list step. |
Dropping loop current when idle on an analog phone
To drop loop current when idle on an analog phone
| 1 | In the User/Group Management applet, in the Users view create a new user or double-click an existing user to edit the user. |
| 2 | On the Phone tab, select the Drop loop current when idle checkbox to cause Wave to briefly interrupt current on the line whenever the user’s phone enters the Idle state (on-hook/not in a call). If unchecked, line current is maintained when the station enters the Idle state. |
| 3 | In Drop loop current for ___ milliseconds, enter the duration of current interruption. The default is 1 second (1000 milliseconds). |
Using mobile extensions for externally routed calls
A Wave mobile extension allows a user’s remote phone to be treated as a Wave station. A remote phone is any phone that is external to the Wave system, for example a cell phone, home phone, iPhone, or legacy PBX phone.
Hint: Configuring a mobile extension according to the following steps is recommended (but optional) for an iPhone user using the ViewPoint Mobile App to ensure that calls forwarded to the user’s ViewPoint Mobile number also appear in the user's Call Log in ViewPoint.
With a mobile extension, a user at a remote phone can:
| • | Use ViewPoint to manage voice messages and greetings, place outbound calls, answer and handle calls displayed in the Call Monitor, and so forth. No configuration steps are required to enable this functionality for a user. |
| • | Use ViewPoint to answer and handle calls that are forwarded to a remote phone or routed to a remote phone as a result of an action in the user’s routing list. You enable this feature for a user as described below. (If a call is forwarded or transferred to an external number, the caller will not hear music on hold, only silence.) |
| • | Use the Wave phone commands for full call control even if the user is not using ViewPoint. |
| • | When a user supplies a remote number when logging on to ViewPoint (as described in “Using ViewPoint with a different phone or Wave” in Chapter 2 in the Wave ViewPoint User Guide). |
| • | When the Imitate a Mobile Extension when routing incoming calls to external numbers checkbox is selected for a user (as described below), a mobile extension is automatically created: |
| • | For each external number in the user’s routing list. |
| • | When the user forwards his or her calls to an external number. |
When the user is currently logged on to ViewPoint at one of these numbers, incoming calls that are forwarded to or routed to the user’s remote phone show up in ViewPoint and can be handled as Wave station calls. If the user is not currently logged on to ViewPoint when an incoming call comes in to one of these numbers, the user can press *# to access the phone commands to manage the call.
To create a mobile extension when routing incoming calls to the user
| 1 | In the User/Group Management applet, in the Users view create a new user or double-click an existing user to edit the user. |
| 2 | On the Phone tab, select the Imitate a Mobile Extension when routing incoming calls to external numbers checkbox to enable ViewPoint call handling features on calls forwarded or routed to a user at a remote phone. |
If deselected, calls forwarded or routed to a user at a remote phone do not appear in the ViewPoint Call Monitor.
| 3 | Select one of the following from the Disconnect when no active calls drop-down list to specify how long to wait before disconnecting a mobile extension when there are no active calls. |
| • | Immediately |
| • | After 5 seconds |
| • | After 10 seconds. This is the default setting. |
| • | After 15 seconds |
| • | After 30 seconds |
| • | When Mobile Extension hangs up |
This setting specifies the number of seconds of dial tone played to the user of a mobile extension after the remote party disconnects, or when the mobile extension user disconnects a call in ViewPoint. You can set the mobile extension disconnect for an individual user or at the user template level.
Automatically going off-hook when alerting
| • | When this setting is enabled, the user’s phone automatically goes off-hook when the user selects a ViewPoint feature that uses the phone, such as play audio or place a call. |
| • | When this setting is disabled, the phone rings normally if it is on-hook when the user selects a ViewPoint feature that uses the phone. |
To automatically go off-hook when alerting
| 1 | In the User/Group Management applet, in the Users view create a new user or double-click an existing user to edit the user. |
| 2 | On the Phone tab, select the Automatically go offhook when alerting station checkbox to have the station automatically go off-hook when the user selects ViewPoint features that use the phone, such as play audio or place a call. |
If unchecked, the phone rings normally if it is on-hook when the user selects these ViewPoint features.
Sending digits to an analog device
This information only applies to analog phone users.
To send digits to an analog device
| 1 | In the User/Group Management applet, in the Users view create a new user or double-click an existing user to edit the user. |
| 2 | On the Phone tab, select one of the following options: |
| • | Do not send digits. Select this method (the default) if you are not integrating a third-party device. No DTMF digits are sent. |
| • | Send DID from PSTN. Send the DID number as DTMF digits from the trunk on which the call came in |
| • | Send user’s extension number. Send the extension number of the calling user as DTMF digits. |
| • | Send call type and extension number. Send the call type and extension number as DTMF digits. |
Disabling softkeys on a digital phone
For digital phone users, you can disable the softkeys on the user's phone.
| 1 | In the User/Group Management applet, in the Users view create a new user or double-click an existing user to edit the user. |
| 2 | On the Phone tab, select the Disable Softkeys checkbox to disable the softkeys used to make selections from the display screen on a digital phone. |
Configuring Flash behavior on an analog phone
For analog phone users, you can use the Flash behavior while in a call field on the Phone tab to select what happens when a user presses Flash (or quickly presses the hook) while on a call. The options are as follows:
| • | System default. The user’s behavior is whatever you have chosen as the system-wide behavior. (See Setting general options.) |
| • | Menu assisted transfer. Pressing Flash takes the user to a menu giving you options for transferring the call. |
| • | Direct transfer. Pressing Flash lets the user immediately enter an extension to transfer the call. Choose this option to make transfers faster and simpler for a user who answers and transfers many calls. Note that with direct transfer, the user cannot access Conference or the other commands on the call handling menu unless he or she has ViewPoint. |
| • | Manage current call. Pressing Flash takes the user to the Wave call handling menu, of which one of the options is transferring the call (for details, see Appendix A of the Wave ViewPoint User Guide). |
Use the Phone \ Call Handling tab to forward a user’s calls and configure how incoming calls are handled if the user’s line is busy or the call is not answered.
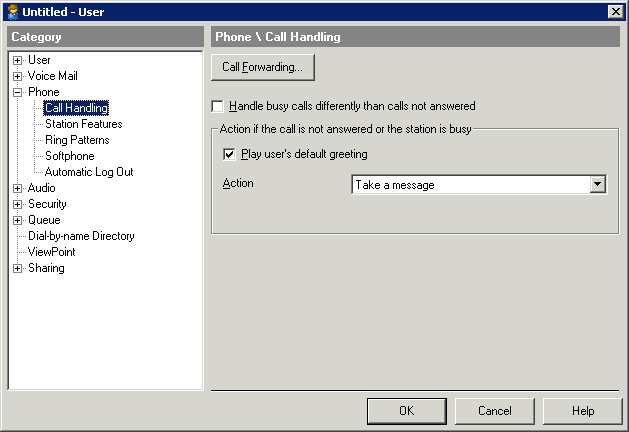
Note: Changing the settings on this tab may alter the user's Preferred Location in their Standard routing list.
Configuring actions for unanswered or busy calls
Use the fields in the Action if the call is not answered or the station is busy section of the Phone \ Call Handling tab to specify what happens when the user receives an incoming call that goes unanswered or that is received while the user’s phone is off-hook.
The available actions are:
| • | Take a message. The call is sent to the user’s voicemail. |
| • | Transfer to external number. The call is transferred to the external number you enter in the Number text box. |
| • | Transfer to extension. The call is transferred to the Extension you select from the Extensions drop-down list, for example, an operator, a co-worker who handles the user’s calls, or an auto attendant. The transferred call is treated as a new call to that extension. If no one answers at that extension, the call follows that extension's routing list. |
| • | Transfer to other voicemail. The call is transferred directly to the voicemail of the extension you select from the Mailbox drop-down list. |
| • | Hang Up. The call is disconnected. |
Optionally, you can also select the Play user’s default greeting checkbox for either action to play the user’s default greeting before performing the action specified.
By default, the same action is applied to both types of calls. To select a different action for unanswered vs. busy calls, select the Handle busy calls differently than calls not answered checkbox.
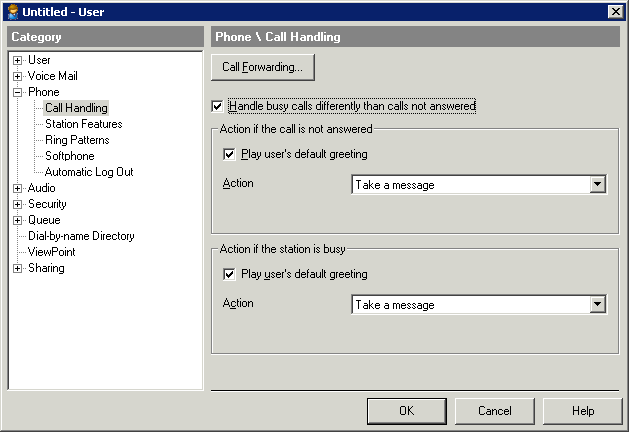
| 1 | In the User/Group Management applet, in the Users view create a new user or double-click an existing user to edit the user. |
| 2 | On the Phone \ Call Handling tab, click Call Forwarding to forward the user’s calls. The Call Forwarding dialog opens. |
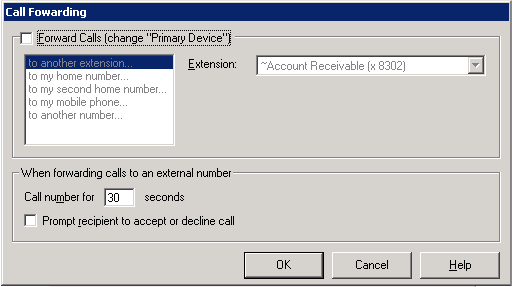
| 3 | Select the Forward Calls (change "Primary Device") checkbox. |
Important! Forwarding a user's calls changes the user's Primary Device, which is the phone where calls to the user's extension will ring.
| 4 | Select the type of forwarding destination in the list below. |
| 5 | Enter the forwarding extension or phone number. For external numbers, select the dialing service to use from the Call Using drop-down list. |
| 6 | Optionally, use Call number for __ seconds to determine how long a call rings at the forwarded phone before proceeding to the next step on the user’s routing list (usually voicemail). |
You can also set the following call forwarding options:
| • | Call number for __ seconds. Determines for how long a call rings at the forwarded phone before proceeding to the next step on the user’s routing list (usually voicemail). If the option Prompt recipient for password or Prompt recipient to accept or decline call is checked (described below), you must allow at least 30 seconds. Otherwise the call might be sent to voicemail before the user finishes listening and responding to the prompts. |
| • | Prompt recipient for password. If checked, the person who picks up the phone hears, “Call for <the user’s voice title>. Please connect me.” To be connected to the caller, the recipient must enter the user’s Wave password. Choosing this option ensures that only users can receive their forwarded calls. |
This option is used only when calls are forwarded to an external number and the user has a voice title recorded.
| • | Prompt recipient to accept or decline call. If checked, when the user picks up the phone, Wave announces the caller (“Call from”) and intended recipient (“Call for”) and offers the option to accept or decline the call. Declined calls proceed to the next step in the user’s routing list, usually voicemail. |
Note: When you forward calls to a mobile phone, make sure that you check Prompt recipient to accept or decline call. See the next section, Mobile phone issues with forwarded calls
Mobile phone issues with forwarded calls
Calls to a mobile phone are picked up by the mobile phone company first and then passed to the individual phone. When Wave detects the first pickup, it stops proceeding down the routing list, whether or not anyone has actually answered the mobile phone. For this reason, when forwarding calls to a mobile phone, always check Prompt recipient to accept or decline call. Wave then relies on user input to signal a connection. Wave proceeds down the routing list unless someone explicitly accepts the forwarded call.
If a forwarded call is not answered, it is sent to the user’s voicemail.
To completely transfer a user’s calls to another user's phone, so that the other user receives voicemail as well as the calls themselves, do not use call forwarding. Instead, use ViewPoint to create a routing list whose final (and only) action is Transfer to Extension, and make it the user’s active routing list. See the Wave ViewPoint User Guide.
The Phone \ Station Features tab
This tab only applies to digital or IP phone users.
Use the Phone \ Station Features tab to add feature buttons to the user's phone, or set additional required or optional feature settings. Not all features are available on all phones. See Available digital and IP phone featuresfor more about features that you can assign.
On Vertical IP Edge 5000i-LLCDG Large LCD screen phone (Gigabit and non-Gigabit models), you can specify a phone label that is displayed next to the corresponding feature button on the phone.
You can use this feature to override the default button label to make it more meaningful in your organization. For example, the default label for the Group Pickup feature is "G pickup"—you can change this label to say "Sales" instead.
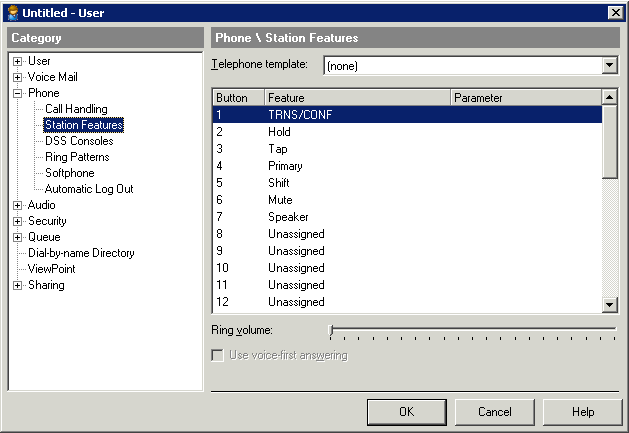
The Phone \ Station Features tab has the following options:
| • | Telephone template.To apply a pre-selected slate of features from a template, select the template from the drop-down list. For more about templates, see Configuring phone templates |
Note: For analog phone users, Phone template is the only field available on this tab, which is called Features.
| • | Button list. For a digital or IP phone, the central pane of the dialog shows a list of features currently assigned to feature buttons on the phone. |
To assign or change a feature button
| 1 | In the User/Group Management applet, in the Users view create a new user or double-click an existing user. |
| 2 | Click the Phone \ Station Features tab. |
| 3 | Select the feature button to assign, and then click in the Feature column for that button. |
| 4 | Click the arrow icon that appear, and then select the feature to assign to the feature button from the drop-down list. |
Note: You must first create a trunk group with outside lines enabled (via the Trunks Group applet) before the Outside Line option will be presented in the list of features that can be configured for a digital phone.
| 5 | If the feature has additional required or optional settings, or if the user has a VerticalIP Edge 5000i-LLCDG Large LCD screen phone that allows you to customize the phone button's label text, click in the Parameter column for the feature button, and then click the “...” icon if one appears. |
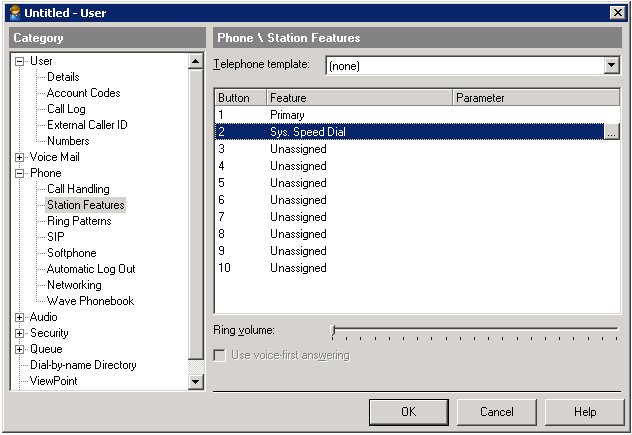
| 6 | In the feature definition dialog that opens, specify additional settings as needed for the feature button you are adding. For example, if you are configuring a System Speed Dial button for a user, do the following: |
| • | Enter the Speed dial index to use. |
| • | To change the Phone button label for a user with a VerticalIP Edge 5000i-LLCDG Large LCD screen phone, type in the label text to be displayed next to the feature button on the user's phone. (For all other phone types, Phone button label is disabled.) |
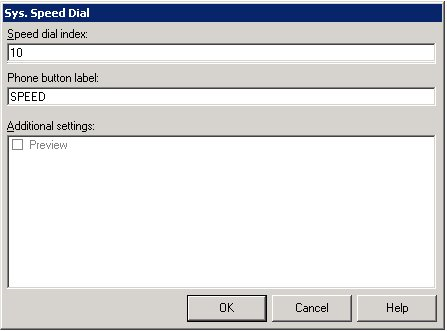
| 7 | Click OK to save the feature button definition and close the feature definition dialog. |
| 8 | Drag the slider bar to adjust the Ring volume of the phone. |
| 9 | Select the Use voice-first answering checkbox to enable voice-first answering. With voice-first answering, internal calls are connected to the user’s speakerphone automatically without the phone ringing or needing to be picked up. All external calls ring the phone as normal. |
| 10 | Click OK to save your changes. |
Note: This tab is displayed only if you specified a digital phone type that supports the DSS Console (see The User tab.) In this version, the DSS console is only supported on the Edge 700 series digital phones.
You use this tab to configure one or more DSS Console devices associated with a user’s digital phone. A DSS console provides “switchboard” capability by expanding the number of extension buttons available to a digital phone user.
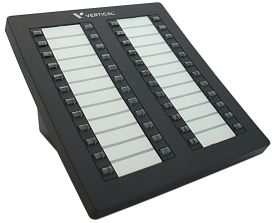
The DSS Console expands a receptionist’s digital phone with 48 additional flexible buttons with LEDs to connect to system endpoints such as user extensions. Up to 5 DSS Consoles can be associated with a single digital phone, providing up to 240 additional buttons.
You can assign most of the same features to a DSS Console button that you can assign to a button on the user’s digital phone. Typically, you assign a Line Appearance feature button for each extension for which this user will answer calls via this DSS console.
Note the following:
| • | Feature button configuration restrictions are enforced across the user’s digital phone and all associated DSS Consoles, for example a restriction that states you can configure only one button of the same type for a user vs.multiple buttons of the same type. |
| • | The following features cannot be assigned to a button on the DSS Console - these features can only be assigned to a button on the user’s digital phone: |
| • | Primary |
| • | Program |
| • | Shift |
| • | Speaker |
| • | Tap |
See The Phone \ Station Features tab for a description of each feature, as well as required and optional settings, configuration restrictions, and so forth.
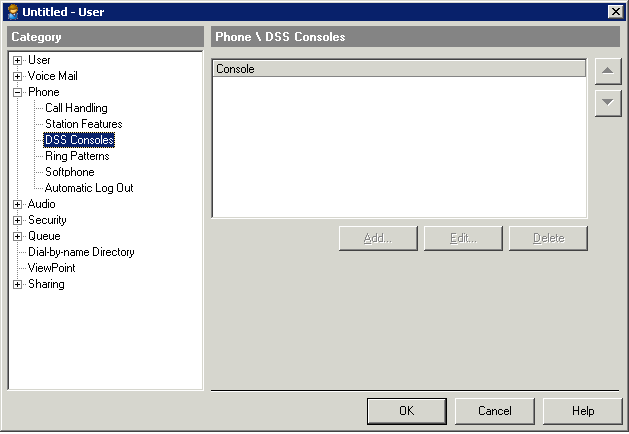
Important! If you change the user’s Telephone type via the User tab while one or more DSS consoles are connected to that extension, a message warns you if DSS consoles are not supported on the new phone type, or if the number of DSS consoles already configured for this user will be over the limit supported on the new phone type. Also, the DSS console button configurations for those DSS Consoles will be deleted, and you will have to redefine all of the buttons, as described below. This limitation will be addressed in a future version.
For instructions on how to connect a DSS Console on the Wave Server, see Chapter 4 in the Wave Server Installation Guide.
DSS consoles and extensions are included in some of the reports available via the Report Generator applet.
| • | Station Ports report. DSS console extensions are listed in the Primary Extension column using the format “<Extension> DSS <n>”, for example “105 DSS 1”. |
| • | Phone Labels report. |
DSS console extensions are also listed in the Station Ports applet. However, they are not listed in the Station Monitor applet, which only lists the user’s primary extension.
To add a DSS console to a user’s digital phone configuration
| 1 | In the User/Group Management applet, in the Users view create a new user or double-click an existing user to edit the user. |
| 2 | Click the Phone \ DSS Consoles tab. |
| 3 | Click Add to add a new DSS console or Edit to modify the selected one. The DSS Console dialog opens: |
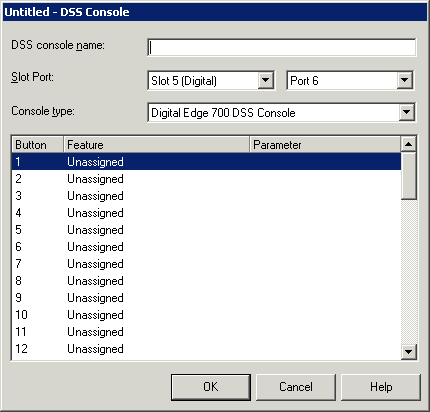
Note: The Add button is disabled if you have already configured the maximum number of DSS consoles for this user’s phone type.
| 4 | Enter the following information for this DSS console: |
| • | DSS console name. Enter a descriptive name for this DSS Console. DSS console name can be maximum of 30 characters. Spaces, special characters, and numbers are allowed. |
| • | Slot Port. Select the appropriate slot and port for the DSS console from the drop-down lists. |
| • | Slot. Defaults to the same slot assigned to the user’s digital phone (see The User tab.) |
| • | Port. Defaults to the next available port on that slot. |
| • | Console type. Select the DSS console model type from the drop-down list. In the current version, only one console type is supported, “Digital Edge 700 DSS Console”. |
| 5 | All of the feature button assignments for this DSS console are listed in the bottom pane. To assign a feature to an unassigned button, click in the Features column for that button, and then select the feature from the drop-down list. |
| 6 | Some features have additional settings. Click in the Parameter column for the button, and then click the “...” button if one is available. Specify the required and optional settings as needed in the dialog that opens. |
| 7 | Click OK until you return to the DSS Consoles tab. |
You use this tab to configure different ring tones for internal and external calls.
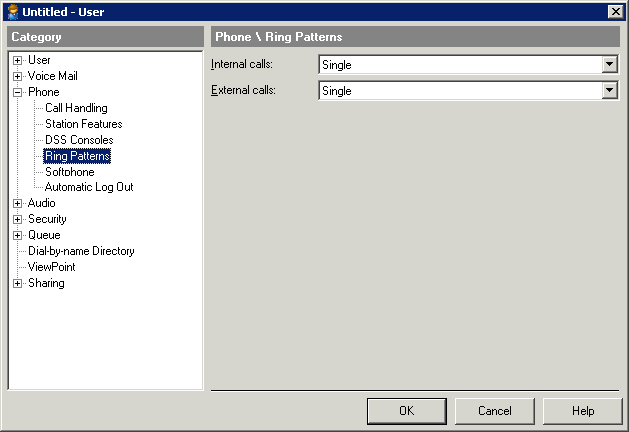
To configure ring patterns
| 1 | In the User/Group Management applet, in the Users view create a new user or double-click an existing user to edit the user. |
| 2 | Click the Phone \ Ring Patterns tab. |
| 3 | Select a ring pattern (Single, Double, or Triple) for Internal calls from the drop-down list. |
| 4 | Do the same for External calls. |
You use this tab to specify SIP authentication and registration settings for a user.
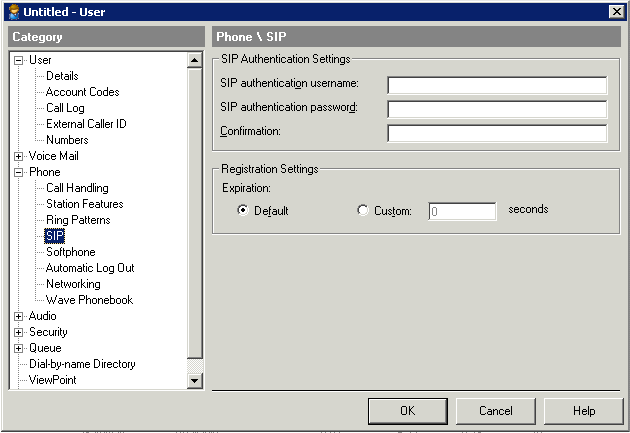
SIP authentication passwords are different from regular Wave passwords, and are not affected by the password settings described in Enforcing strong password security.
Note: A SIP authentication password is now automatically generated for all users. The password can be changed and the phone will be updated automatically.
See Setting up SIP endpoint authentication for other configuration steps you must complete in order to perform SIP authentication with Wave.
To specify SIP authentication and registration information for a user
| 1 | In the User/Group Management applet, in the Users view create a new user or double-click an existing user to edit the user. |
| 2 | On the Phone \ SIP tab in the SIP Authentication Settings section, the user’s SIP authentication username is assigned automatically and cannot be changed. SIP authentication username consists of the user’s last name plus extension. |

| 3 | Enter the user’s SIP authentication password, and then re-enter it in the Confirmation field. This password can be a maximum of 48 characters, and can include alphanumeric characters, spaces, and special characters. A blank password is allowed. |
| 4 | In the Registration Settings section, specify the length of time in seconds before a SIP phone or SCP attempts to reregister. |
Use the default value unless you want to specifically override the default global registration expiration timer for this user.
| • | Default. Use the default global registration expiration timer value specified via IP Telephony in the SIP Advanced Parameters dialog. |
| • | Custom. For this user, specify the number of seconds to use for the registration expiration timer. |
You use the Softphone tab to enable the user to use the ViewPoint Desktop softphone or ViewPoint Mobile softphone.

About the ViewPoint Mobile softphone
Starting in Wave 4.5, Wave includes an integrated mobile SIP softphone. Users can place calls using any Wi-Fi or cellular data connection. Additional call controls enable users to place calls over a data connection utilizing all the call functionalities while remaining in ViewPoint. Users have complete control over which networks ViewPoint Mobile may use for placing voice calls, choosing whichever network suits their needs the best, at any given time or location.
ViewPoint Mobile softphone requires Wave 4.5 with an OpenVPN server. Note that the OpenVPN server is not needed if ViewPoint Mobile is connected to the same network as Wave.
ViewPoint Mobile is initially supported on iOS v. 6.0+ devices and Android v. 4.x+ devices, including non-phone devices.
During the Wave4.5 Beta period, see the WaveRelease Notes for more about the ViewPoint Mobile softphone.
About the ViewPoint Desktop softphone
With the ViewPoint Desktop softphone, a user can dial numbers via the ViewPoint Softphone dial bar and answer calls via the Call Monitor. The ViewPoint Softphone uses the PC’s microphone and speakers, headset, or other USB audio devices for audio playback and capture.
The ViewPoint Softphone can be used in either of the following ways:
| • | As a primary phone, when a user does not have a physical phone. The ViewPoint Softphone can be used as a user’s primary phone from the local LAN or when running ViewPoint while logged in via VPN from a remote location. One Wave IP User license is required for each user who uses the ViewPoint Softphone as his or her primary phone. |
| • | As as a secondary phone, allowing a user to place and take calls via ViewPoint when the user is away from his or her physical phone. No additional Wave licenses are required for users who use the ViewPoint Softphone as a secondary phone—usage of the ViewPoint Softphone is covered by those users’ existing Wave ISM User licenses. |
Before you can enable the ViewPoint Softphone for a user via this tab, the following requirements must be met:
| • | Specify the user’s phone type as described in Specifying a phone type and model. |
| • | Make sure that adequate Wave licenses are available on the Wave. When the ViewPoint Softphone is used as a primary phone, a Wave IP User license is required for that user. When the ViewPoint Softphone as a user’s secondary phone, no additional Wave license is required—usage of the ViewPoint Softphone is covered by the user’s existing Wave ISM User license. |
To enable the ViewPoint Desktop or ViewPoint Mobile softphone
| 1 | In the User/Group Management applet, in the Users view create a new user or double-click an existing user to edit the user. |
| 2 | Click the Phone \ Softphone tab. |
| 3 | Select the Enable ViewPoint desktop softphone checkbox. (This checkbox is disabled if no Wave ISM User license is available, or you have not yet specified the user’s phone type on the User tab.) |
When you save a user with this checkbox selected, an extension is automatically assigned with the format “Vnnnnnn”. This extension will inherit the user’s properties, except for the following:
| • | No folders, permissions, routing lists, or other features are associated with this extension. |
| • | This extension is not displayed in any lists of user extensions in ViewPoint. |
| • | This extension is not listed in the dial-by-name directory. |
Note: This extension is only used internally by Wave. Other users and external callers will still “know” this user by his or her regular Wave extension.
Once this option is enabled, in order for the user to use the ViewPoint Softphone, configure the audio playback and capture devices on the user’s laptop in ViewPoint by choosing Tools > Options > Phone > Softphone Devices. For more information, see Chapter 12 in the Wave ViewPoint User Guide.
| 4 | Select the Enable ViewPoint mobile softphone checkbox. (This checkbox is disabled if no Wave ISM User license is available, or you have not yet specified the user’s phone type on the User tab.) |
The Phone \ Automatic Log Out tab
You use this tab to enable and configure the automatic log out feature for a user.
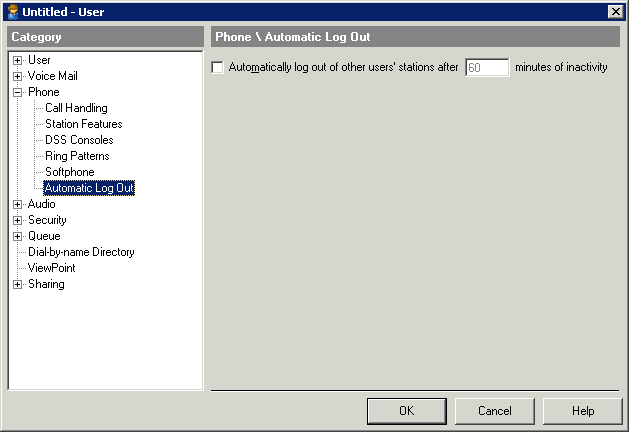
Note: This tab applies to all phone types—analog, digital, and SIP.
If the user has logged in at another user’s workstation—using either ViewPoint or the phone commands—the setting on the User dialog’s Phone \ Automatic Log Out tab determines how much inactive time elapses before the user is automatically logged out and the station is reset to its default user. This feature is useful if a roaming user walks away from a phone without logging out.
To specify the automatic logout interval
| 1 | In the User/Group Management applet, in the Users view create a new user or double-click an existing user to edit the user. |
| 2 | Click the Phone \ Automatic Logout tab. |
| 3 | Enter the number of minutes in Automatically log out of other user’s stations after __ minutes of inactivity. |
All calls are written to the Call Log according to the user logged in at the station, so a user can log in anywhere in the office and make calls that are logged correctly under his or her name. Calls from the station continue to be logged under the visiting user’s name until one of the following happens:
| • | The visiting user logs out, either by pressing *000 at the dial tone if the user used *51 to forward his or her calls or by choosing File > Exit and Log Off in ViewPoint. This resets the station to its default user. |
| • | Another user logs in to the station using ViewPoint or phone commands. This resets the station to the new user. |
| • | The amount of time specified in Automatically log out of other user’s stations after __ minutes of inactivity is exceeded. This resets the station to the default user. Inactivity is defined as any time except during active calls (inbound or outbound) and when phone commands are used that require entering a password (for example, logging into the phone to listen to voicemail). All other station activity, such as picking up the phone and dialing *14, or using ViewPoint to play a voice message over the station, count as inactivity. |
Note: Incoming calls for other users, such as calls forwarded to the station, do not count as activity even if they are answered.
Deselect the Automatically log out of other user’s stations after __ minutes of inactivity checkbox to prevent resetting the station after any amount of inactivity.
You use this tab to enable VPN or NAT traversal on a user's phone.
Enabling VPN on a user's supported IP phone
For more about Wave OpenVPN Server, see Using OpenVPN Server.
For a list of Vertical phones that can be used with OpenVPN Server, see Supported phones and devices.
To enable VPN on a user's supported IP phone
| 1 | If necessary, click the Administration tab of the Management Console. |
| 2 | Click User/Group Management, located in the PBX Administration section of the Management Console. |
| 3 | Edit the user, and select Phone > Networking in the left pane. |
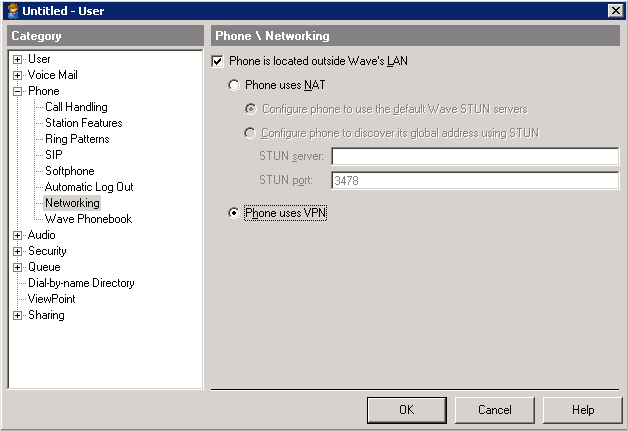
| 4 | Select the Phone is located outside Wave’s LAN checkbox. |
| 5 | Click Phone uses VPN. |
| 6 | Click OK to save your changes for this user. |
Enabling NAT traversal on a user's remote IP phone
Important! Before configuring NAT traversal for a user as described in this section, you must configure NAT traversal on the Wave Server. See CSV file format for inputting users for more about Wave Server and router configuration requirements.
To configure NAT traversal for a remote user
Perform the following step for each Wave user with a remote IP phone (an IP phone that is outside your Wave network).
| 1 | If necessary, click the Administration tab of the Management Console. |
| 2 | Click User/Group Management, located in the PBX Administration section of the Management Console. |
| 3 | Edit the user, and select Phone > Networking in the left pane. |
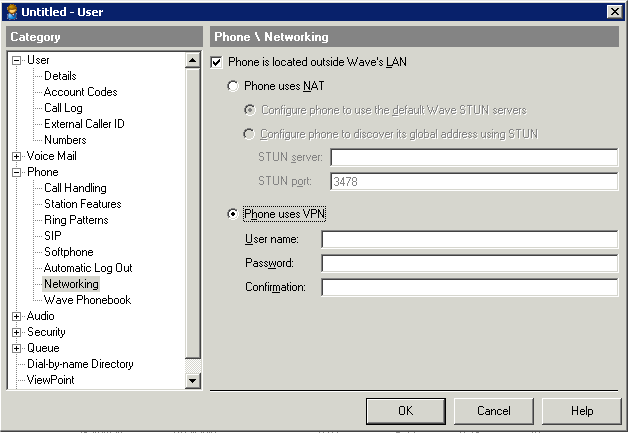
| 4 | Select the following options: |
| • | Phone is located outside Wave’s LAN |
| • | Phone uses NAT |
| 5 | Select one of the following: |
| • | Configure phone to use the default Wave STUN servers. Select this option if you want this user to use the STUN servers that you specified via IP Telephony. In most cases, you should select this option. |
| • | Configure phone to discover its global address using STUN. Select this option if you want this user to use a different STUN server, then specify that STUN server’s IP address or hostname. |
| 6 | Click OK to save the user. |
The Phone \ Wave Phonebook tab
You use this tab to configure the Wave Phonebook for an Edge 5000i IP phone user.
The Wave Phonebook is a searchable directory of public ViewPoint Groups or private contacts that is accessible directly from a button on a user’s Edge 5000i IP phone. Especially for users with no access to ViewPoint, this feature provides access to the same synchronized directory information as other Wave users have, and makes deploying custom phonebooks (for example customer contact directories) easy to deploy.
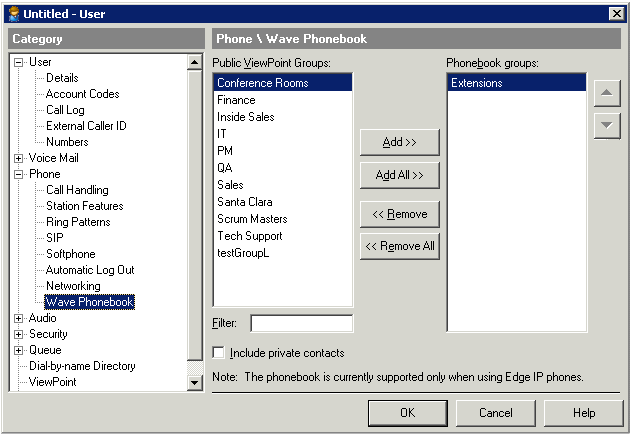
Setting up the Wave Phonebook for an Edge 5000i IP phone user consists of the following steps:
| • | Specifying the public ViewPoint Groups to appear in the user’s Phonebook. |
| • | Adding a Phonebook button to the user’s Edge 5000i P phone |
Using the Phonebook on an Edge 5000i IP phone is described in the Wave Phone User Guide.
To configure the Wave Phonebook for an Edge IP phone user
| 1 | In the User/Group Management applet, in the Users view create a new user or double-click an existing user to edit the user. |
| 2 | Click the Phone \ Wave Phonebook tab. |
| 3 | Use the Add and Remove buttons to build the Phonebook from the list of public ViewPoint Groups. |
| 4 | Select a Group in the Phonebook groups list and use the Up and Down arrow buttons to control the order in which the Groups will be displayed in the Phonebook on the user’s phone. |
You can type into the Filter text box to quickly narrow the list of ViewPoint Groups, rather than having to scroll through the entire list.
| 5 | Select the Include private contacts checkbox to include the phone’s logged-in user’s private contacts in the Phonebook directory. They will be listed in a “Private Contacts” group at the bottom of the Phonebook. |
To add a Phonebook button on an Edge 5000i IP phone
| 1 | In the User dialog, select Phone \ Station Features in the left pane. |
| 2 | Assign the Phonebook feature to an unassigned button. |
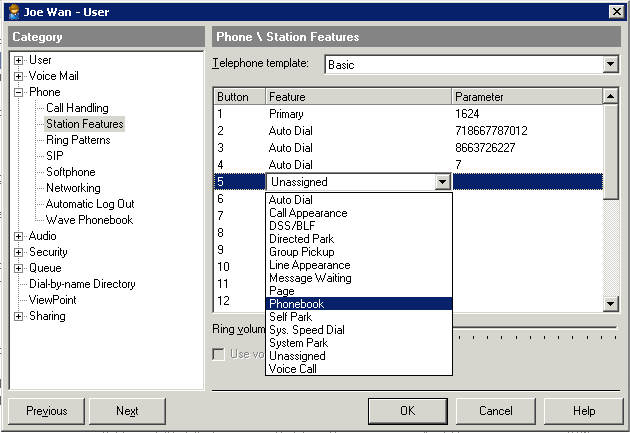
You use this tab to define the capabilities of Spectralink phones.
Note: Currently, only Spectralink 8400 series phones are supported.
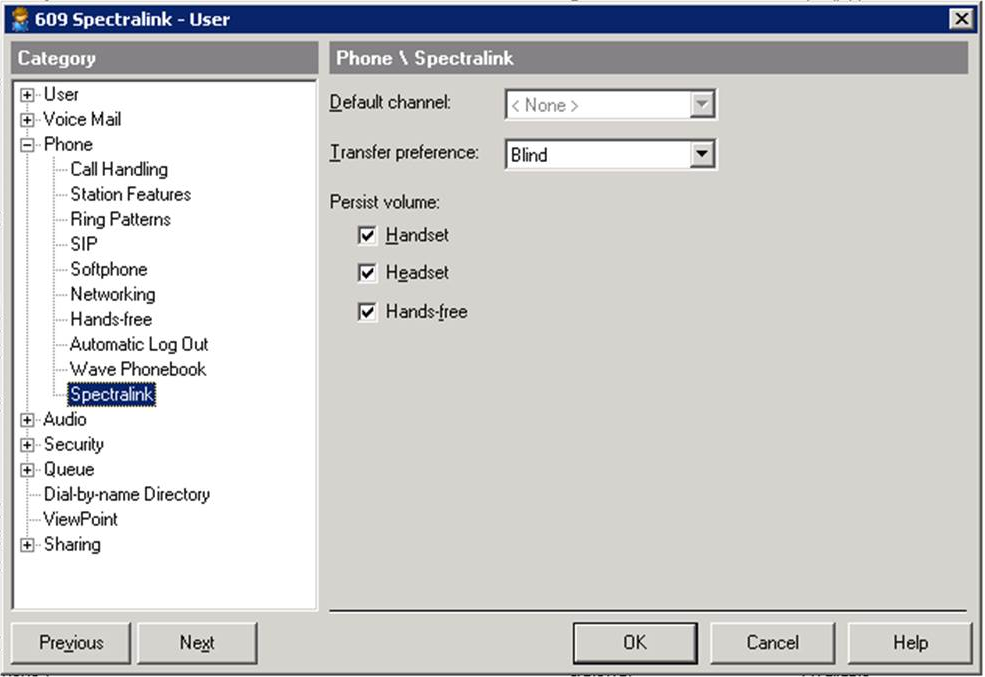
Spectralink phones support the ability to use “Push to Talk” broadcast messaging with other Spectralink phones. Before you can assign a user to a channel as described below, you must set up one or more Push to Talk groups. See Spectralink Push To Talk Settings for details.
To configure Spectralink settings for a user
| 1 | In the User/Group Management applet, in the Users view create a new user or double-click an existing user to edit the user. |
| 2 | Click the Phone \ Spectralink tab |
| 3 | Select the user's Default channel from the drop-down list. This user will send and receive Push to Talk messages on this channel. |
| 4 | Specify the following: |
| • | Transfer preference. Select Blind or Supervised from the drop-down list. This setting determines how a call is transfered by this user. |
| • | Persist volume. These settings ensure that any volume setting changes the user makes on his or her device will persist when the device is powered off and back on. You can specify settings for Handset, Headset, and Hands-free. |
| 5 | Click OK to save your changes. |
You use this tab to allocate audio resources for the user.

Setting the storage size for greetings and voice titles
| 1 | In the User/Group Management applet, in the Users view create a new user or double-click an existing user to edit the user. |
| 2 | Click the Audio tab. |
| 3 | In the Maximum greeting and voice title storage field, enter how many minutes worth of audio files this user can store for greetings and voice titles. These voice file types include the following: |
| • | Greetings. All greetings displayed in ViewPoint’s Greetings view. |
| • | Voice titles. The user’s own voice title plus all voice titles for the user’s contacts. |
The default setting of 10 minutes requires 4.6 MB of storage. The User/Group Management applet opens a warning message if the total allotment of voice message and greeting space for all users exceeds the available disk space on the Wave Server.
Choosing a language for phone prompts
From the Telephone prompts drop-down list, choose the language that Wave system prompts will play in for this user. When the user logs on or is identified on the phone, Wave automatically switches to this language for all subsequent system prompts during the call. The language can be also be set in ViewPoint. This setting does not affect any prompts that other callers or users hear.
The Telephone prompts drop-down list shows all of the languages currently installed on the Wave Server. See Setting up system-wide audio options for more about how to install additional languages.
The Audio \ Hold Music, Voice Title, and Disk Usage tabs
Expand the Audio tab category to select the Audio \ Hold Music, Audio \ Voice Title, and Audio \ Disk Usage tabs.
Expand the Audio tab in the category pane to select the Hold music tab. You use this tab to configure a music-on-hold source for the user.
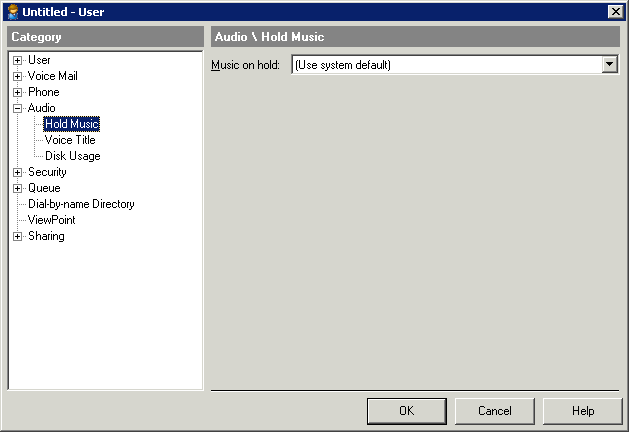
Each user can have his or her own music-on-hold source as described below, or default to the system source (see Configuring Music On Hold.)
A caller hears this music while on hold for the user and continues to hear it while on hold until reaching a part of Wave that uses different hold music, such as a Contact Center queue or an auto attendant that has different hold music settings.
Important! In some call scenarios (calls handled by certain SIP carriers, and calls transferred to an external number), the caller will not hear music on hold, only silence, no matter what you specify here.
To customize hold music for a user
| 1 | In the User/Group Management applet, in the Users view create a new user or double-click an existing user to edit the user. |
| 2 | Click the Audio \ Hold Music tab. |
| 3 | Expand the Audio tab category and select the Hold Music tab. |
| 4 | Select the Music on hold source you want to use for this user from the drop-down list. |
| • | (Use system default). Use the system-wide hold music source as specified in the General Settings applet. |
| • | Disabled. Do not play music to callers on hold. |
Important! It is highly recommended that you specify a music-on-hold source or use the system default so that a caller does not hear extended ringing or silence, which may result in a hang-up. Note that in some call scenarios (calls handled by certain SIP carriers, and calls transferred to an external number), the caller will not hear music on hold, only silence, no matter what you specify here.
| • | External (Audio Input Jack). Play hold music from an external device, typically a CD player, radio, or specialized music-on-hold device. This source is specified via the General Settings applet (PBX tab) in the Global Administrator Management Console. See Configuring Music On Hold. |
| • | Song n (<song title>). Play the selected WAV file to callers on hold. |
Note: The system default music-on-hold source (if specified) as well as the other items listed in this drop-down list are set up via the General Settings applet. For more information, see Configuring Music On Hold.
| 5 | Click OK. |
Recording the user’s voice title
Expand the Audio tab in the category pane to select the Voice Title tab. You use this tab to record the user’s voice title.
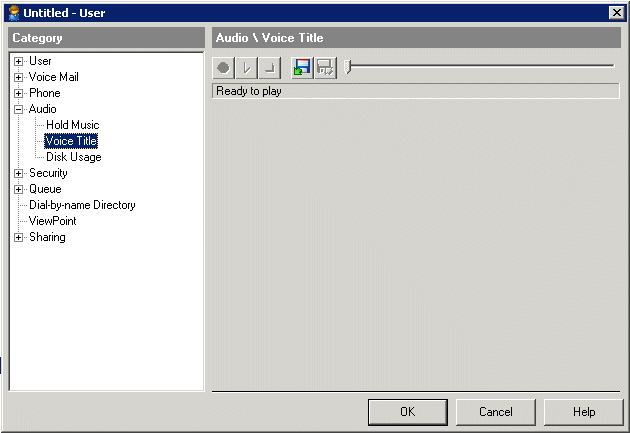
A user’s voice title is a short recording consisting only of the user’s name. Wave uses the voice title in several prompts, for example, the call screening prompt when the user calls another user (the user receiving the call hears “Call from <voice title>”). Users can record their voice titles themselves in their own voices, using either the phone commands or ViewPoint. However, since the voice title is a critical part of the Wave system (for example, users without a voice title are not listed in the dial-by-name directory), it is recommended that you record them, after which those users who want to re-record them can do so.
To record the voice title, use the audio controls. See Using the audio controls.
| 1 | In the User/Group Management applet, in the Users view create a new user or double-click an existing user to edit the user. |
| 2 | Click the Audio \ Disk Usage tab. |
| 3 | Expand the Audio tab in the category pane to select the Disk Usage music tab. You use this tab to display how much space the user’s audio files are taking up. The percentage of allocated space is also displayed. |

To avoid slowing the opening and scrolling of the Users view, Wave does not dynamically recalculate these totals. Totals are recalculated once a day at 1:00 a.m. You can also recalculate the totals at any time by choosing Tools > Recalculate Disk Usage.
To configure space for the user’s voice messages, see
You use the Security tab to configure the user’s password settings and whether the user’s calls can be supervised.
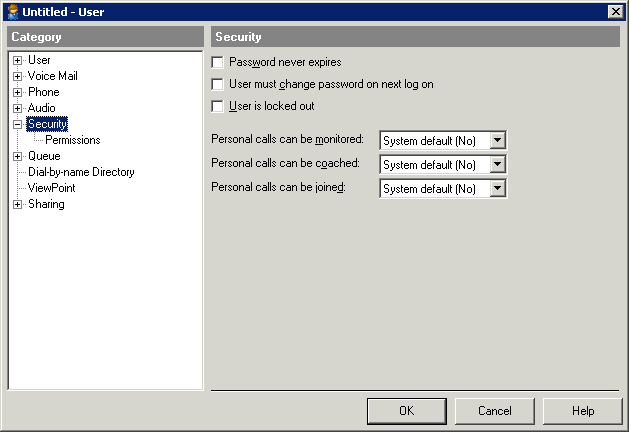
Configuring password expiration
Use the options on the Security tab to protect the user’s account and your Wave system from unauthorized access and toll fraud. For more information about toll fraud, see Protecting Your Phone System Against Toll Fraud.
The following security options are available:
| • | Password never expires. If checked, the user’s password does not expire, although you can always manually change it or force the user to change it. If unchecked, the user’s password may expire as determined by your system settings. |
Note the following:
| • | Checking this field is a security risk, as long-standing passwords are easier to guess. |
| • | You should check this field for users of IP phones that use PLAR, because a changed password prevents the phone from working. |
| • | User must change password on next logon. If checked, the system requires the user to change his or her password the next time he or she logs on to any workstation application or by using the phone commands. |
Configuring whether the user’s calls can be supervised
You can choose whether the user’s personal calls can be supervised by other users with permission to do so. These settings do not apply to Contact Center queue calls. Supervision of Contact Center queue calls is controlled separately by agent permissions.
In each of the following fields choose “Yes,” “No,” or “System Default”:
| • | Personal calls can be monitored. Any user with the “Allow monitoring user calls” permission can listen to this user’s personal (not queue) calls without this user knowing. |
| • | Personal calls can be coached. Any user with the “Allow coaching user calls” permission can add himself or herself to this user’s personal (not queue) call and be heard by this user, but not by the caller. |
Note: To coach a call between two users, the user being coached must allow coaching and the other user must allow monitoring. This is because coaching the first user automatically involves hearing (monitoring) the other user. If your supervisors will be coaching calls between users, you should set up users to allow monitoring as well as coaching.
| • | Personal calls can be joined. Any user with the “Allow joining user calls” permission can add himself or herself to this user’s personal (not queue) call as a full participant. |
The Security \ Permissions tab
You use the Security \ Permissions tab to define permissions and roles for the user.
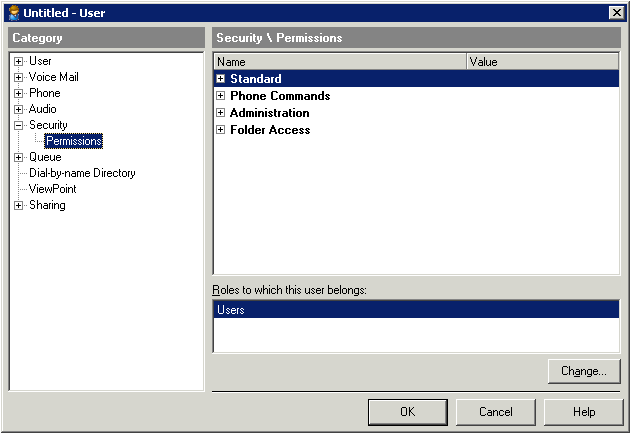
For an explanation of all the user permissions, see Wave permissions.
Before assigning permissions and roles to users, set up the roles (see Managing roles ). A role is a template enabling you to apply the same group or collection of permissions to multiple users, so by setting up roles in advance, you can save time in giving each user the permissions he or she needs.
Assigning a user’s permissions
A user’s permissions determine which Wave views and features he or she can use. For an explanation of all the user permissions, see Wave permissions.
To assign the user’s permissions
| 1 | Assign the user to a role if necessary. A role is a collection of permissions. By default, new users belong to the Users role. To assign the user to a new or different role, click Change. See the next section for instructions. |
Note: A quicker way to assign batches of users to a role is to edit the role. See Assigning users to a role.
You can assign a user to more than one role. If the roles’ permissions conflict, the most permissive setting is used. For example, users who belong to both the Users role and the Administrators role have their permission for Place external calls when logged on via a trunk set to Allow, which is the permission level for the Administrators role.
| 2 | If you want to give the user unique permissions, different from those of the roles to which he or she belongs, edit the user’s permissions using Security \ Permissions tab. The user’s Permissions tab settings override all role settings. |
To adjust an individual permission for a user, click the Value column for that permission on the Permissions tab. Select one of the following from the drop-down list:
| • | Use roles (value). Permission for this item is determined by the user’s role memberships (described in the following section). The actual value of the permission is displayed in parentheses. |
| • | Allow. The listed feature (for example, exporting Contacts) is available to the user. |
| • | Disallow. The listed feature is not available to the user. |
| • | View and Edit. The listed tab or folder (such as the Phone settings tab or the Call Log folder) can be viewed and edited by the user. |
| • | View only. The listed tab or folder can be viewed by the user, but not edited. |
| • | No access. The listed folder or tab cannot be accessed in any way by the user. |
To change the roles to which the user is assigned
| 1 | In the User/Group Management applet, in the Users view create a new user or double-click an existing user to edit the user. |
| 2 | Click the Security \ Permissions tab. |
| 3 | Click Change. The Roles dialog opens. |
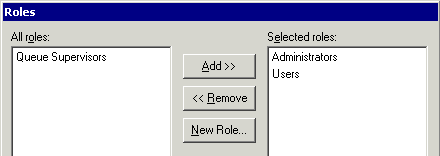
| 4 | Use Add and Remove to place the roles to which the user should belong in the Selected roles list. |
To create a new role, click New Role.
| 5 | Click OK. |
Note: If the user belongs to no roles, by default the user’s permissions are all set to deny access.
If you are using the Wave Contact Center, you use this tab to assign a cost to the agent (in order to factor the cost of an agent into call distribution), or assign pre-defined custom attributes that affect call distribution to the agent.
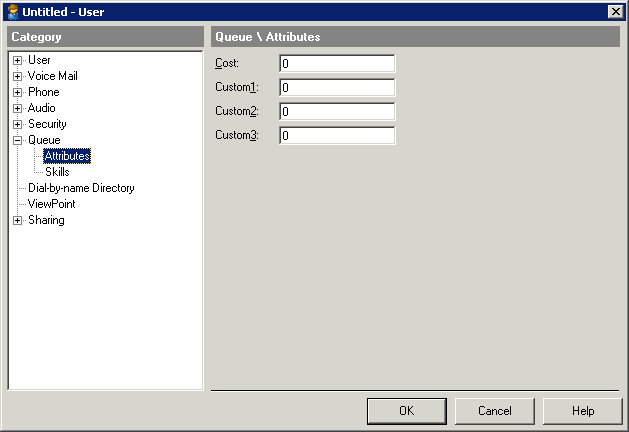
For details about how to use custom call routing, see the Wave Contact Center Administrator Guide.
If you are using the Wave Contact Center, you use this tab to assign pre-defined skills to the user in order to route calls based on agents’ skill levels.
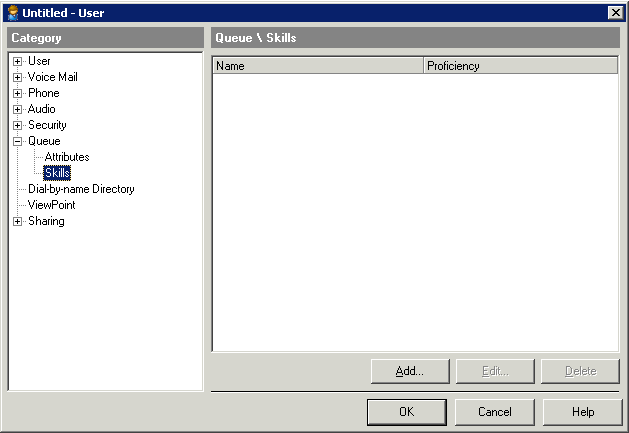
For details about how to use skills-based call routing, see the Wave Contact Center Administrator Guide.
The Dial-by-name Directory tab
You use the Dial-by-name Directory tab to specify whether the user can be looked up by name by callers who don’t know the user’s extension.
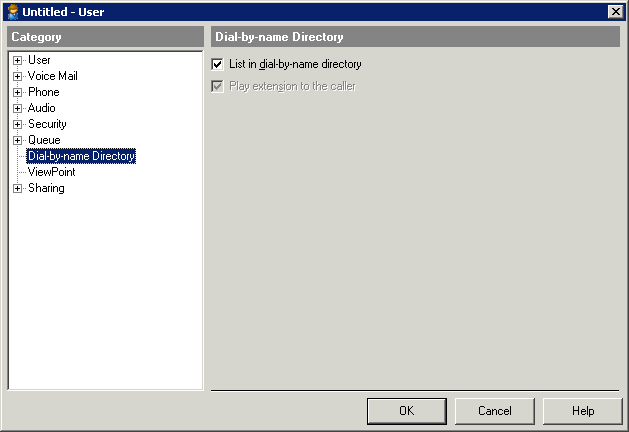
| 1 | In the User/Group Management applet, in the Users view create a new user or double-click an existing user to edit the user. |
| 2 | Click the Dial-by-Name tab. |
| 3 | To include a user's name in the dial-by-name directory that callers can search, check List in dial-by-name directory, and make sure that the user has a voice title recorded. |
| 4 | To play a user's extension along with the user's name when callers choose the user from the dial-by-name directory, check Play extension to the caller. |
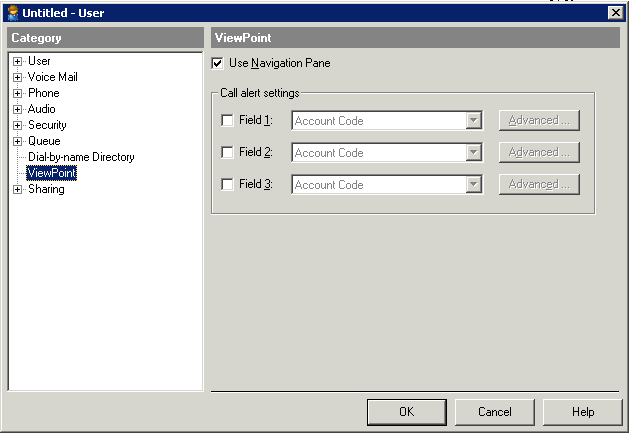
You use this tab to set custom ViewPoint call alert options for the user.
When a ViewPoint user receives an incoming call, an Incoming Call Alert window pops up. By default, the Incoming Call Alert window displays only the name and phone number of the caller. You can specify up to 3 additional Call Monitor fields to be displayed in the Incoming Call Alert window. You can specify standard ViewPoint Call Monitor fields as well as custom variables that you have defined.
The following example shows an Incoming Call Alert window with the 2 default fields and 2 custom fields (Custom Data and Account Code):
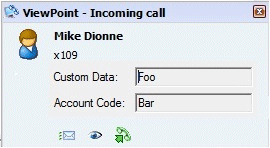
By default, any field that you select is displayed with its own Call Monitor label and full contents. Optionally, you can supply a custom label for the field and modify how the field’s data is displayed as described below.
To set custom call alert settings for a user
| 1 | In the User/Group Management applet, in the Users view create a new user or double-click an existing user to edit the user. |
| 2 | Click the ViewPoint tab. |
| 3 | Select the Field 1 checkbox. |
| 4 | Select the field to display in the Incoming Call Alert window in ViewPoint from the drop-down list. |
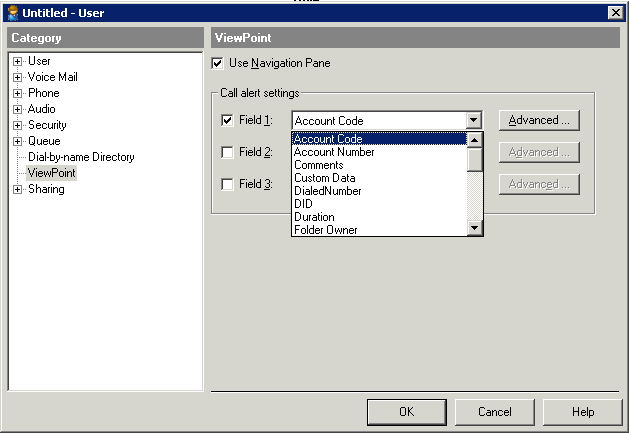
| 5 | Click Advanced to define how the specified data will be displayed for an alerting call in ViewPoint, for example to define a custom label or display only part of the data. |
Important! In this version, a size restriction on the Incoming Call Alert window in ViewPoint prevents it from displaying all data for all 3 fields. Click Advanced to modify the data so that the most relevant data is visible without the user having to manually resize the Incoming Call Alert window. (Note that once a user resizes the Incoming Call Alert window, the new size will be retained when the window is displayed for subsequent calls.)
The Call Alert - Advanced dialog opens:
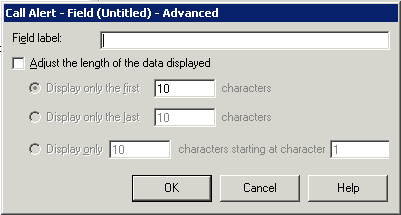
| 6 | Enter the following information: |
| • | Field label. Enter a custom label for the selected field. |
| • | Adjust the length of the data displayed. Select this checkbox to trim the information displayed. (If unchecked, the entire contents of the field are displayed.) Click one of the following: |
| • | Display only the first ___ characters. Enter the number of characters to display, starting with the first character. |
| • | Display only the last ___ characters. Enter the number of characters to display, starting with the last character. |
| • | Display only ___ characters starting at character ___. Enter the number of characters to display and indicate the starting character. |
| 7 | Click OK to save your settings. |
| 8 | Repeat these steps to specify up to 3 custom alert settings for this user. |
You use the Sharing tab and subtabs to share one or more of this users’s ViewPoint folders with other users. For example, members of a project team may want to share contacts, call information, voice messages, and so forth.
Expand the Sharing tab in the category pane tab to select the appropriate tab to share any of the following folders:
| • | Call Monitor. Contact Center queue calls are not displayed in a shared Call Monitor. |
| • | Call Log. |
| • | Contacts folder. |
| • | Messages folder including the Inbox, Saved, and Deleted subfolders. Voice messages marked Private do not appear in a shared folder. |
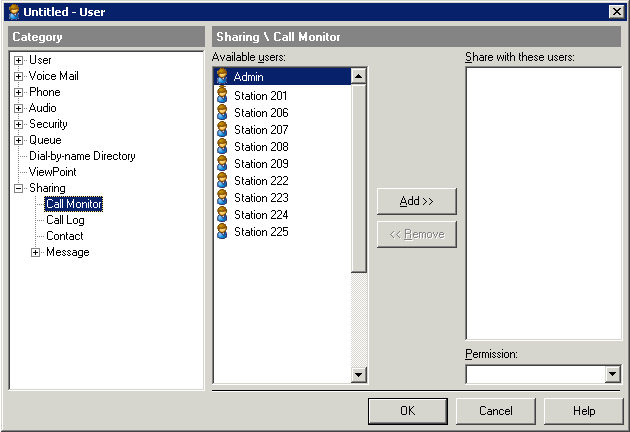
The following steps describe how to share a folder via any of the Sharing tabs.
To share the user’s folder with other users
| 1 | In the User/Group Management applet, in the Users view create a new user or double-click an existing user to edit the user. |
| 2 | Click the Sharing tab for the folder that you want to share. |
| 3 | In the Available users list, select one or more users with whom the folder will be shared. |
| 4 | Click Add to add the selected users to the Share with these users list. |
Click Remove to remove selected users from the Share with these users list.
| 5 | Select one of the following access levels from the Permission drop-down list. The users that you select can access the folder contents based on the access level that you select. |
| • | View only. Users can view or listen to items in this folder, but cannot edit or delete them. |
| • | View and Edit. Users can view, listen to, edit, move, and delete items from this folder. |
Note: A user with View and Edit permission can delete voice messages from another user’s shared folder. If that other user has also shared his or her Deleted folder, the deleted message is moved to that Deleted folder. If that other user has not shared his or her Deleted folder, the deleted message is permanently removed.
Creating and updating users via a user template
You can use user templates to do the following:.
| • | Create new users quickly. Instead of editing all of a new user’s settings via the individual User dialog tabs, you can create a new user using the minimum required fields and then apply a user template (for example, “Tech Support Rep template”) to fill in the rest of the settings for that type of user. If necessary, you can then go in and do any final customization required on settings not covered by the template. |
| • | Apply user settings in bulk. You can quickly update the settings for multiple users by making changes in a user template that you then apply to all users associated with that template. |
About the User Template dialog
To open the User Template dialog, in the User/Group Management applet choose Tools > User Templates.
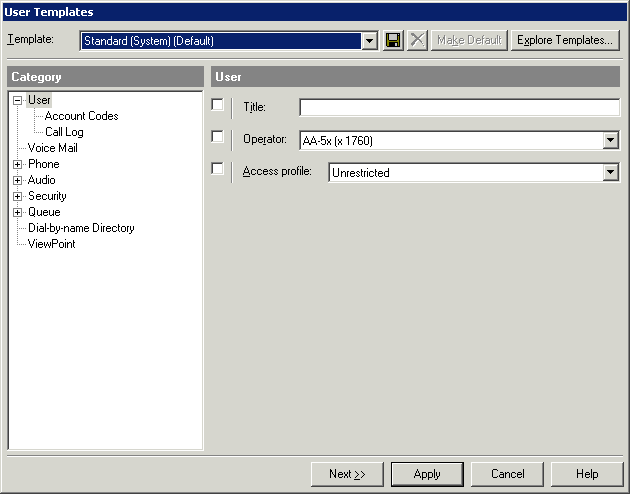
The User Templates dialog is similar to the User dialog, but there are fewer tabs and some tabs have fewer settings than the corresponding User dialog tab. See User Templates dialog tabs for details.
Also, each user template setting is preceded by a checkbox:

If the checkbox to the left of a field is selected, the user’s corresponding setting will be updated when the template is applied. If you do not want the user setting to be changed, deselect the checkbox for that setting.
The following area is displayed at the top of each tab in the User Template dialog, and is used to select, save, create, or rename a user template, and also to make the currently-selected user template the default template used when you create new users via the User dialog.

| • | Template. Select the user template to apply or edit from the drop-down list. |
Caution! When the User Template dialog opens, the Template drop-down list is automatically positioned at the first template in the list (in alphabetical order). Before starting to create a new template, make sure that you select the correct template (typically the Standard (System) template).
| • | Save As. Click to save the current template definition under a different name. |
| • | Delete. Click to delete the selected user template. |
| • | Make Default. Click to make this the user template which will provide default values when you import a new user via a CSV file. Note that in the current version, the user template default values are not applied when you create a new user via any other method. |
| • | Explore Templates. Click to browse the user templates folder. |
The following table lists the tabs and settings available in the User Templates dialog. See the indicated User dialog section for details about how a tab or setting is used.
|
To specify |
See page |
||||||||||||||||
|
User |
Basic user information, including title, personal operator, and access profile. This tab also includes the Access profile field. |
||||||||||||||||
|
User \ |
Whether and under what circumstances Wave prompts the user to enter an account code for a call. |
||||||||||||||||
|
User \ Call Log |
Whether the user’s calls are logged, and whether the user belongs to an Organization. |
||||||||||||||||
|
Voice Mail |
User’s voice mailbox size and features. Note that WaveMail settings (for Microsoft Exchange synchronization) are not available in the User Template dialog. |
||||||||||||||||
|
Phone |
Call waiting, Flash behavior, and other phone options. Note that the following phone type-specific settings are not available in the User Template dialog:
|
||||||||||||||||
|
Phone \ Automatic Log Out |
Phone login behavior on other users’ phones. |
||||||||||||||||
|
Phone \ |
Configurable ring tones for internal and external calls. |
||||||||||||||||
|
Phone \ Softphone |
If the ViewPoint integrated mobile softphone is enabled for the user. |
||||||||||||||||
|
Audio |
Storage size for greeting and voice title files, and phone prompt language. |
||||||||||||||||
|
Audio \ Hold Music |
Personalized hold music source. |
||||||||||||||||
|
Security |
Password expiration control, and whether the user’s calls can be supervised. |
||||||||||||||||
|
Security \ Permissions |
All user permissions, and the roles to which the user belongs. |
||||||||||||||||
|
Queue \ Attributes |
Assign non-skill attributes (cost, custom attributes) to the user for call routing purposes. |
||||||||||||||||
|
Queue \ Skills |
For skill-based call routing, define a set of skills that you can then assign to the user. |
||||||||||||||||
|
Dial-by-name Directory |
Whether the user is listed in the Wave dial-by-name directory. |
||||||||||||||||
|
ViewPoint |
ViewPoint application options. |
Perform these steps to create a new user template, and identify the users to whom it will be applied.
To create a new user template
| 1 | If necessary, click the Administration tab of the Management Console. |
| 2 | Click User/Group Management, located in the PBX Administration section of the Management Console. |
| 3 | Choose Tools > User Templates to open the User Templates dialog. |
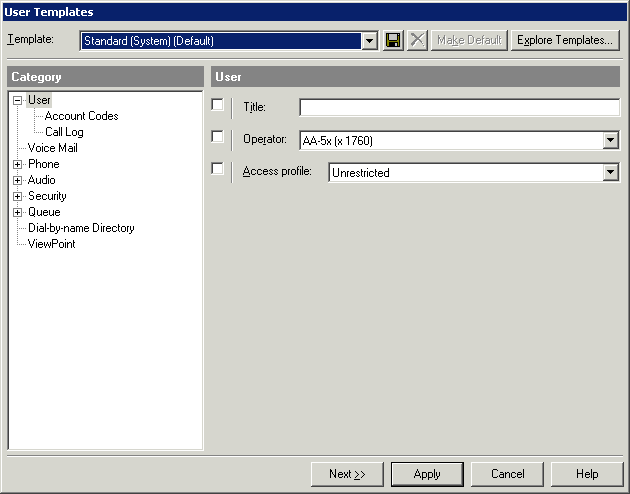
You can base your new user template on any existing template, for example “Standard (System)”.
| 4 | Select the template to start with from the Templates drop-down list at the top of the dialog. |
| 5 | Using the tabs in the Category pane, modify the available settings as required. See the table in About the User Template dialog for cross-references to topics each tab and field. |
| 6 | When you are done, click  at the top of the dialog to save the template under a new name. The Save Template As dialog opens: at the top of the dialog to save the template under a new name. The Save Template As dialog opens: |

| 7 | Enter a name for the new user template and then click OK. The new user template is added to the Templates drop-down list: |

| 8 | Click Next>> at the bottom of the dialog to select one or more users and roles and apply this template to them: |
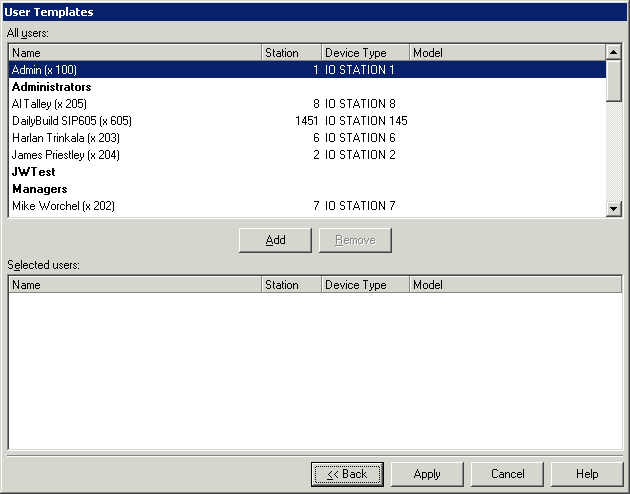
Click <<Back to return to the User Templates dialog showing all available tabs.
| 9 | Select one or more users in the All users list, and then click Add to add them to the Selected users list. You can also add a group of users by selecting a Role. Roles are formatted in bold in the Users List. |
| 10 | Click Apply to apply the user template to the selected users. |
Adding new users via a user template
You can specify the user template that will be used by default when you import new users via a CSV file.
Note that in the current version, the user template default values are not applied when you create a new user via the User dialog.
To specify the default user template
| 1 | In the User Templates dialog, select the user template in the Templates drop-down list. |
| 2 | Click Make Default. |
Now, when you import a user via a CSV file (as described in Importing users via a CSV file) the user will default to the values in the user template. To finish defining the user, customize the default values as needed, and define settings not included in the user template.
Applying user settings in bulk
You can use user templates to apply or change user settings for many users at once.
To apply user settings in bulk
| 1 | Create or select a user template as described in Creating a new user template. |
| 2 | Make any changes to the template that you want to apply to the users. |
| 3 | Click Next>> at the bottom of the dialog. |
| 4 | Select one or more users and roles in the All users list, and then click Add to add them to the Selected users list. |
| 5 | Click Apply to apply the user template to the selected users. |
Importing users via a CSV file
You can import multiple users in bulk from a comma separated values (CSV) file, rather than add users one at a time.
This section describes how to do the following:
| • | Prepare a CSV file for importing. |
| • | Import users from a CSV file. |
| • | Make changes to the contents of a CSV file before importing, and then export the changed version to a CSV file. |
Note: The Export button only appears after you have imported a CSV file and made changes. In this version, you cannot use the Export button to export a complete list of all current users directly from the User/Group Management applet.
To prepare a comma-separated values (CSV) file for importing
| 1 | In Microsoft Excel or a text editor such as Notepad, create a new file. See Import Users CSV file format for the required layout of this file. |
Note: A sample user import template is available on V-Connect (choose Products > Wave IP > Technical documents > Bulk User Import Template).
| 2 | Add each user to be imported as a separate row, and enter the appropriate information for each column. |
| 3 | Save the file as a CSV file to any location on the Wave Server. |
To import users from a CSV file
| 1 | In the Global Administrator Management Console, start the User/Group Management applet. |
| 2 | Click File > Import and Export. |
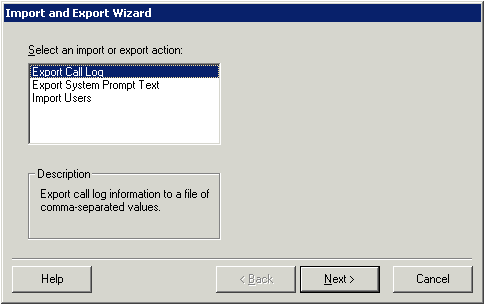
| 3 | In the Import and Export Wizard, click Import Users. Click Next to continue. |
| 4 | In the Select Import Source dialog, select CSV (comma delimited) file. |
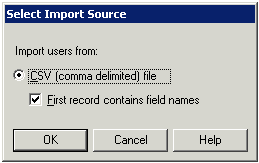
If your CSV file does not have a row of column headers as the first row, uncheck First record contains field names.
| 5 | Click OK. Browse to the location of your CSV file (which must be on the Wave Server), and then click Open. |
| 6 | The Edit and Review Users dialog opens, where you can make final changes before importing. You can make the following changes: |
| • | To edit a cell, click the cell and type the new value. |
| • | To manually add a new user, click New User to create a new row in the grid, then fill in the user information. |
| • | To add more users from another CSV file, click Add to re-open the Select Import Source dialog. |
| • | To remove one or more users so that they are not imported, select the users and click Remove. Hold down the CTRL key while clicking to select multiple users. |
Optionally, click Export to export the list, with the changes that you’ve made, to a CSV file. You can save the exported file to any location on the Wave Server.
| • | Errors (in red). Users with errors will not be imported. Errors include duplicate extensions or DID numbers. |
| • | Warnings (in yellow). Warnings indicate users who will be imported but who may require manual intervention later to resolve ambiguities or other issues. To prevent the Edit and Review Users dialog from displaying warnings in the next pass, check Ignore warnings. |
Repeat step 7 until all users have been successfully imported.
Note the following requirements for an Import Users CSV file:
| • | The first row of the file can optionally contain the column headings listed in the table below. Although this is not required, it may make the file easier to work with. |
| • | The columns of data must stay in the order indicated. Note that the fields are the same as those in the User dialog. |
| • | If you omit a column (accepting the default value for that column for a user), you must enter a comma (,) as a placeholder for that column. |
In the following example of an Input Users CSV file, the first row in the file lists the column headings:
First Name,Last Name,Extension,Slot,Port,MAC Address,Telephone Type,User Template Name,Phone Template Name,Access Profile,Title,Password,Comments,Home Phone,Home Phone 2,Mobile Phone,Call Forwarding Number,E-mail,E-mail 2,IM Address,E-mail Notification Address,Pager Notification Number,Call Notification Number
DANIEL,SMITH,150,,,,Comdial 8012,Basic,Unrestricted,,1150,
,,,,,,,,,,
PAUL,JOHNSON,151,,,,Comdial 8024,,Basic,Unrestricted,,1151,
,,,,,,,,,,
MARK,WILLIAMS,152,,,,Edge 100-12,,Agent,Unrestricted,,1152,
,,,,,,,,,,
ELIZABETH,ANDERSON,153,,,,Edge 100-24,,Basic,Unrestricted,,
1153,,,,,,,,,,,
JENNIFER,THOMAS,154,,,,Edge 700-24,,Basic,Unrestricted,,1154,
,,,,,,,,,,
WILLIAM,JACKSON,155,,,,Edge 700-8,,Basic,Unrestricted,,1155,
,,,,,,,,,,
DAVID,WHITE,156,,,,ImpactSCS 8312SJ,,Basic,Unrestricted,,1156,
,,,,,,,,,,
RICHARD,MARTIN,157,,,,ImpactSCS 8324SJ,,2 Lines,Unrestricted,,
1157,,,,,,,,,,,
CHARLES,THOMPSON,158,,,,Comdial 8024,,,Unrestricted,,1158,
,,,,,,,,,,
JOSEPH,GARCIA,159,,,,Vodavi 30 Executive,,Basic,Unrestricted,,
1159,,,,,,,,,,,
THOMAS,MARTINEZ,160,,,,Vodavi 8 Enhanced,,Basic,Unrestricted,,
1160,,,,,,,,,,,
PATRICIA,ROBINSON,161,,,,Vodavi 8 Executive,,Basic,
Unrestricted,,1161,,,,,,,,,,,
Deleting a user prevents that user from using Wave and removes all of the user’s voicemail files from the system (the user's voice messages are deleted even if the mailbox is shared with another user). A deleted user’s Call Log entries are left in place to maintain an accurate and complete call history on the system.
Hint: Before deleting a user, archive their voice messages to WAV or MP3 files for later retrieval if needed.
To delete a user, in the User/Group Management applet, right-click the user and then select Delete.
Important! A warning is displayed if you try to delete a user who is currently being used as a target location of any kind, for example:
“This user is currently being used as a routing list target: [Name] (extension). Edit or delete these locations before deleting this user.”
The warning is displayed if you try to delete a user who is currently being used as any of the following, and contains the indicated information:
| • | Forward-to extension: [Name] (extension) |
| • | Intercept destination: [Name] (Trunk Group) |
| • | Also ring extension: [Name] (Trunk Group) |
| • | Call notification: [Name] (extension, Cascading Notification Rule: [Rule Name]) |
| • | Call notification: [Name] (extension) |
| • | Routing List target: [Name] (extension) |
| • | Menu choice for auto attendant: [AA Name] extension) |
| • | ViewPoint Group member: [Group Name] |
| • | Operator: [Name] (extension) |
Roles are groups that enable you to apply the same set of permissions to multiple users. You can create as many different roles as you want, to represent different groups of users who have similar permissions. Roles appear in the Users view in bold.
When a user belongs to a role, he or she inherits the role’s permissions. A user can belong to more than one role, in which case the most permissive settings apply in cases of conflict.
You can grant a user individual permission settings that override those of the role, by adjusting his or her permissions individually on the Permissions tab of the User dialog. The Security \ Permissions tab .
Wave comes with the following three roles:
| • | Administrators. You cannot delete this role, but you can edit some of its settings. By default the role has full permissions. You can disallow only the following permissions: |
| • | Log on via a station |
| • | Log on via a trunk |
| • | Log on via a SIP trunk |
| • | Place external calls when logged on via a trunk |
| • | Place external calls from a station |
| • | Forward or route calls to external numbers |
| • | Return calls when logged on via a trunk |
The Admin user belongs to the Administrators role by default.
| • | Users. By default new users belong to this role. |
| • | Managers. The Managers role should be used for end-user managers who need access to some system settings, but not full administrative access. This role's permissions can be fully customized. |
The quickest way to assign a batch of users to a role is to edit the role and add the users.
You can also assign a user to a role by editing the user. See The Security tab .
To edit an existing role, double-click it in the Users view. For further instructions, see the next section.
When editing a role, be aware of the following:
| • | When you change a role’s permissions, those permissions change for all users belonging to the role, except where a user’s individual permission setting overrides the role, or where a user’s other role provides a more permissive setting. |
| • | When you remove a user from a role, the user loses all permissions granted by that role. |
| • | The Administrators role can only be edited in limited ways. |
You can create a new role, for example Admin Assistant, for a group of users that require the same or similar permissions. All users that you assign to this role are automatically granted its permissions, except where their individual permission settings override the role settings.
| 1 | If necessary, click the Administration tab of the Management Console. |
| 2 | Click User/Group Management, located in the PBX Administration section of the Management Console. |
| 3 | Choose File > New > Role. The Role dialog opens. |
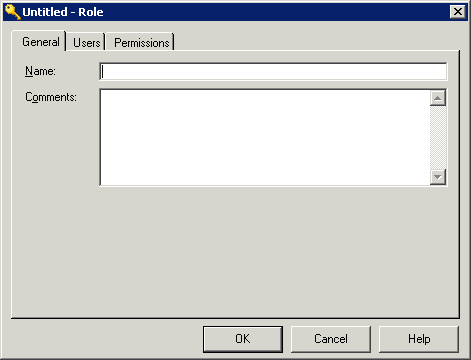
| 4 | Enter a short, descriptive Name for the role (for example, “Sales”) and any Comments about how it will be used. |
| 5 | Click the Users tab to identify which users belong to the role. |
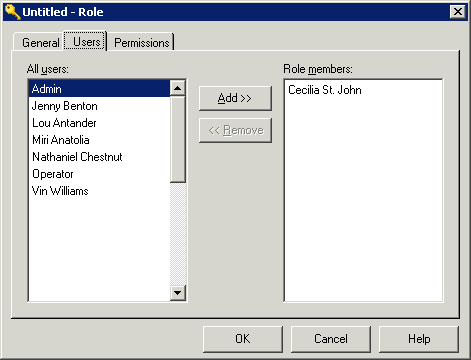
| • | To add users to the role, select them in the All users list and click Add. |
| • | To remove a user from the role, select the user in the Role members list and click Remove. |
| • | To select several users at once, hold down SHIFT or CTRL as you click. |
| 6 | Click the Permissions tab to define the features and folders that members of a role can or cannot access. |
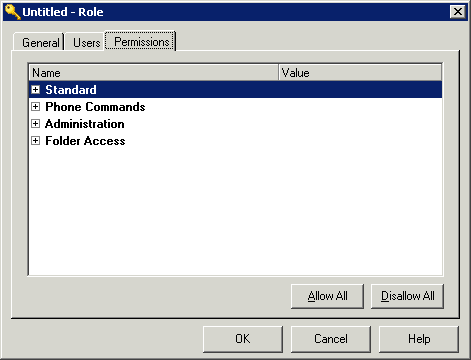
For a description of each category and the permissions in that category, see Wave permissions.
| 7 | To set a permission, expand a category and click on the permission, and then select the permission level from the Value drop-down list. |
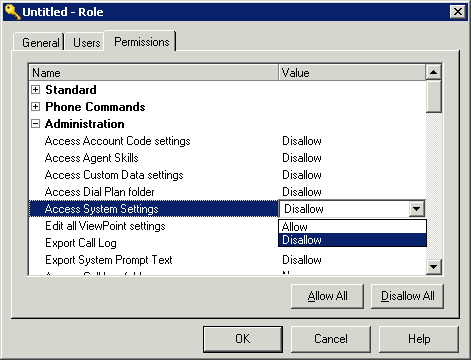
Depending on the permission, you can specify a value from either of the following groups:
| • | Allow / Disallow. The selected feature or item is or is not available to the role member. |
| • | View and Edit / View Only / No access. The listed tab or folder: |
| • | Can be viewed and edited by the role member |
| • | Can be viewed by the role member, but not edited. |
| • | Cannot be accessed in any way by the role member. |
| 8 | You can also set permissions by clicking the following buttons: |
| • | Allow all. Sets all permissions to “Allow” or “View and Edit” for this role. |
| • | Disallow all. Sets all permissions to “Disallow” or “No access” for this role. |
Important! The Administrators role is handled differently than other roles—the only permissions that are changed by clicking Allow all or Disallow all are the ones related to dialing, to help control toll fraud. See Disallowing security-risk user permissions for a list.
| 9 | Click OK to close the Role dialog. |
A user’s access to Wave features is controlled by permissions. There are two types of Wave permissions:
| • | General user permissions. These control what ViewPoint views and Wave commands the user can use. |
| • | Contact Center agent permissions. These apply only to agents in a Contact Center queue, and control what queue features the agent can use. For details, see Chapter 2 in the Wave Contact Center Administrator Guide. |
Users inherit general permissions and dialing permissions from the roles to which they belong. (A role is a collections of permissions that you set up to define a job or role in your organization.) See
Wave permission changes made via the User/Group Management applet are not reflected in ViewPoint until after the affected user restarts ViewPoint.
You can assign permissions in any of the following ways:
| • | To assign permissions to a role, see Creating a new role. |
| • | To assign individual permissions to a user, see The Security tab . |
| • | To assign permissions via a user template, see Creating a new user template. |
The following table describes the permissions that you can define for individual users or roles.
|
Wave General User Permissions |
|||||||||||||||||||||||||||||||
|
Permission |
Controls the ability to... |
||||||||||||||||||||||||||||||
|
Standard user permissions These permissions control the ability to use specific Wave Server features. |
|||||||||||||||||||||||||||||||
|
Access Call Center Reporter |
Controls the ability to use the Contact Center Reporter to run reports from ViewPoint. For more about running ViewPoint reports, see Chapter 13 in the Wave ViewPoint User Guide. |
||||||||||||||||||||||||||||||
|
Add parties when replying to voicemail |
Controls the ability to send voicemail replies to additional users as well as the sender. (Applies only to replying to voice messages via ViewPoint.) |
||||||||||||||||||||||||||||||
|
Allow coaching/joining/ |
Controls the ability to coach, join, or monitor other users’ calls. Note that the target user must also be set up to permit call supervising (see Configuring whether the user’s calls can be supervised). |
||||||||||||||||||||||||||||||
|
Allow ViewPoint Mobile Connection |
Controls the ability to use the Mobile ViewPoint Client to make and take calls and access some ViewPoint features from supported mobile devices, such as an iPhone, iPad and so forth. |
||||||||||||||||||||||||||||||
|
Place external calls when logged on via a trunk |
Controls the ability to dial in to Wave from a remote location and place external calls through the Wave that get billed to that Wave. |
||||||||||||||||||||||||||||||
|
Place external calls from a station |
Controls the ability to place outbound calls on Wave trunks. |
||||||||||||||||||||||||||||||
|
Change Personal Status |
Controls a user’s ability to change his or her own personal status. Note that in a Contact Center environment, disallowing this permission for agents helps ensure that they take calls during their shifts. |
||||||||||||||||||||||||||||||
|
Change the Personal Status of any user |
Controls a user’s ability to change their own or another user’s personal status using the Apply Personal Status command in ViewPoint. Note that the user must enter the other user’s password to change that user’s personal status. |
||||||||||||||||||||||||||||||
|
ViewPoint call control |
Controls a user’s ability to use the ViewPoint Call Monitor to handle calls. |
||||||||||||||||||||||||||||||
|
Delete Call Log entries |
Controls a user’s ability to use the Edit > Delete command in the Call Log in ViewPoint or in the User/Group Management applet. |
||||||||||||||||||||||||||||||
|
Export data |
Controls a user’s ability to export contacts or the Call Log via ViewPoint. |
||||||||||||||||||||||||||||||
|
Forward or route calls to external numbers |
Controls a user’s ability to specify an external number when forwarding calls or setting up routing lists. |
||||||||||||||||||||||||||||||
|
Forward voicemail |
Controls a user’s ability to controls a user’s ability to forward voice messages to one or more users. |
||||||||||||||||||||||||||||||
|
Allow Instant Messaging |
Controls the ability to send and receive instant messages in ViewPoint. |
||||||||||||||||||||||||||||||
|
Allow inter-organizational Instant Messaging |
Controls the ability to send and receive instant messages with users in Wave organizations other than the one the user belongs to. The Allow Instant Messaging permission must be enabled in order for a user to send and receive inter-organizational instant messages. |
||||||||||||||||||||||||||||||
|
Log on via IP trunk |
Controls a user’s ability to log on while on a SIP call to Wave. |
||||||||||||||||||||||||||||||
|
Log on via station |
Controls a user’s ability to log on by pressing # at a Wave phone. |
||||||||||||||||||||||||||||||
|
Log on via trunk |
Controls a user’s ability to log on when calling from a remote location, either via the auto attendant or by pressing 9 at a voicemail greeting. |
||||||||||||||||||||||||||||||
|
Change password |
Controls a user’s ability to change his or her own Wave password. |
||||||||||||||||||||||||||||||
|
Off-hook page |
This permission is not currently supported. |
||||||||||||||||||||||||||||||
|
Record calls |
Controls a user’s ability to record calls using the Call Monitor. Important: It is the license-holder’s responsibility to comply with any federal, state, or other applicable statutes regarding the recording of phone calls. Vertical disclaims any responsibility for failing to comply with such regulations. Some countries, states, or other locations require that you announce to callers that their calls may be or are being recorded. Be sure to instruct any users with this permission (or who inherit this permission from a role) how to comply with call recording privacy requirements. For more information, see Privacy issues with call recording. |
||||||||||||||||||||||||||||||
|
Reply to voicemail |
Controls a user’s ability to send a voice message as a reply to a received voice message. |
||||||||||||||||||||||||||||||
|
Report on all Call Logs |
Controls a user’s ability to run the Call Log report on the Call Log of any user or queue. When set to Disallow (the default), the report can be run only on the Call Log of the user logged in to the Reporter in ViewPoint. For more about the Call Log report, see Chapter 13 in the Wave ViewPoint User Guide. |
||||||||||||||||||||||||||||||
|
Return external calls when logged on via a trunk |
Controls the ability to use the 43 or 44 commands to call back a voice message from an external number, when calling in from a remote location. |
||||||||||||||||||||||||||||||
|
Show ‘All’ tab in ViewPoint Extensions view |
Controls the ability to see the “All” tab in ViewPoint’s Extensions view, which shows all extensions in the system. (With this tab turned off, the user can still see the filtered tabs, such as tabs for ViewPoint Group or call center queue extensions.) |
||||||||||||||||||||||||||||||
|
Synchronize voice mail and contacts |
Controls the ability to use Wave Mail to synchronize a user’s voice messages and contacts between Wave and the user’s e-mail program. |
||||||||||||||||||||||||||||||
|
Access... settings |
Controls the ability to view and use the specified feature, available in ViewPoint’s Options dialog (Tools > Options). You can set individual permissions for the following settings:
|
||||||||||||||||||||||||||||||
|
Access voice title |
Controls the user’s ability to record his or her own voice title, using ViewPoint, the User/Group Management applet, or the phone commands. (This permission does not affect the ability to record or capture voice titles for contacts.) |
||||||||||||||||||||||||||||||
|
Phone Commands permissions These permissions control the ability to enter specific feature commands via the phone. |
|||||||||||||||||||||||||||||||
|
Access saved messages |
Controls the ability to press 2 after logging on to access voice messages in the Saved folder. |
||||||||||||||||||||||||||||||
|
Callback last incoming call |
Controls the ability to dial *69 to return the most recent incoming call. |
||||||||||||||||||||||||||||||
|
Manage account settings |
Controls the ability to use the 6 command from the Voicemail / Account menu to manage account preferences. |
||||||||||||||||||||||||||||||
|
Send message to all |
Controls the ability to send a voice message to 8888#, which sends the message to all users. |
||||||||||||||||||||||||||||||
|
Set personal status: |
Controls the ability to set the specified personal status by logging in and pressing
The permissions for Available (Non-Queue), Available, and Available (Queue Only) control the ability to dial *50-*52 to set that personal status. |
||||||||||||||||||||||||||||||
|
Start a new call via # |
Controls the ability to press # for dial tone to dial a new call from either the Voicemail / Account menu (after logging on) or the Call Handling menu (after pressing Flash). |
||||||||||||||||||||||||||||||
|
Administration permissions These permissions control the ability to perform specific administrative functions: |
|||||||||||||||||||||||||||||||
|
Access... |
Controls the ability to view and be able to use the specified feature in the User/Group Management applet. You can set individual access permissions for the following features:
|
||||||||||||||||||||||||||||||
|
Edit all ViewPoint settings |
Controls the ability of the specified user to log on to ViewPoint (using a command line switch) and edit another user’s ViewPoint settings without knowing the user’s ViewPoint password. This is a global permission that gives this user access to all other users on the system. See Modifying a user’s ViewPoint settings. |
||||||||||||||||||||||||||||||
|
Export Call Log |
Controls the ability to export the Call Log via the User/Group Management applet. |
||||||||||||||||||||||||||||||
|
Export System Prompt text |
Controls the ability to export system prompts to a text file via the User/Group Management applet. |
||||||||||||||||||||||||||||||
|
Access... folder |
These permissions control the degree of access the user has to the specified folder in the User/Group Management applet. The choices are:
No access. The folder view does not appear in the User/Group Management applet. View only. The user can view but not edit or delete the folder’s items. View and Edit. The user has full access to the folder.
You can set individual access permissions for the following folders:
Note that the permission “Access Queues folder” enables a user to sign agents in and out of any queue, including themselves if they are non-observer agents. This permission overrides the per-queue permission “Queue sign in/out”, set via the Queue dialog. For more information about setting queue permissions, see Chapter 2 in the Wave Contact Center Administrator Guide. Note that the objects shown in the Dial Plan view are edited using the permissions for other folders (Users, Queues, etc.), so the permission “Access Dial Plan” folder has an Allow/Disallow choice. |
||||||||||||||||||||||||||||||
|
Folder Access These permissions control whether a user has full, read-only, or no access to a particular folder view in ViewPoint. The choices are: |
|||||||||||||||||||||||||||||||
|
Access... folder |
These permissions control the degree of access the user has to the specified folder in ViewPoint. The choices are:
No access. The folder view does not appear in ViewPoint. View only. The user can view but not edit or delete the folder’s items. View and Edit. The user has full access to the folder.
You can set the following individual folder view access permissions:
Note that a “No access” setting prevents the user from accessing the folder even using the ViewPoint API. Disallowing a folder using the “Folder Visibility” permission removes it from ViewPoint, but still permits access via the API. |
||||||||||||||||||||||||||||||
Modifying a user’s ViewPoint settings
There are times when you may need to troubleshoot aspects of a user’s account that can only be accessed via ViewPoint, for example to listen to and re-record the user’s voicemail greetings.
Wave lets you modify a user’s ViewPoint settings by logging on to ViewPoint using special command-line switches
Requirements:
| • | You must have ViewPoint installed to use this modify a user’s ViewPoint settings. |
| • | The user must have the Wave permission Edit all ViewPoint settings set. |
To modify a user’s ViewPoint settings
| 1 | Right-click the ViewPoint shortcut icon on your Windows Desktop and then choose Properties. |
| 2 | On the Shortcut tab, enter the following command in the Target text box: |
Syntax:
“C:\Program Files\Vertical Wave\ViewPoint\Vertical.Wave.ViewPoint.exe” /adminuser:<adminusername> /adminpassword:<adminpassword> /loginuser:<username> /server:<serverIP>
| • | For <adminusername> and <adminpassword>, enter your Wave user account logon credentials—this must be an account with the Edit All ViewPoint Settings permission. |
| • | For <username>, enter the name that the user provides when logging on to ViewPoint. |
| • | For <serverIP>, enter the IP address of the Wave Server. |
Note: The values you enter for both <adminusername> and <username> need to be inside quotation marks, because the normal format used for Wave user account names includes a space.
Examples:
| • | In this example, the administrator Jeff Bohn and user Neil Pratt are both Wave users and Jeff Bohn has the Edit All Viewpoint Settings permission: |
/adminuser:”Jeff Bohn” /adminpassword:12345 /loginuser:”Neil Pratt” /server:172.27.208.171
| 3 | Click OK to continue. When you launch ViewPoint via the shortcut, it opens with the selected user logged in. To modify many ViewPoint settings, choose Tools > Options. See “About customizing ViewPoint” in Chapter 12 in the Wave ViewPoint User Guide for details. |
Specifying ViewPoint Desktop processor affinity
You can specify a processor affinity setting that will be applied to all ViewPoint Desktop users. This setting determines the physical processor on a user's PC on which ViewPoint Desktop runs, and allows ViewPoint users to take full advantage of the processing power available to them.
Previously, ViewPoint Desktop always ran on the first physical processor on the PC; this could cause performance problems on a system running multiple ViewPoint Desktop sessions via Remote Desktop, because all of the sessions ran on the same physical processor.
To specify ViewPoint Desktop processor affinity
| 1 | If necessary, click the Administration tab of the Management Console. |
| 2 | Click General Settings, located in the General Administration section. |
| 3 | Click the System tab. |
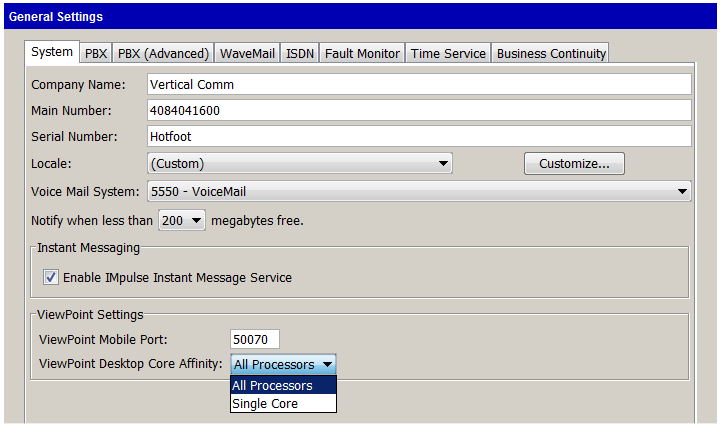
| 4 | Select one of the following from the ViewPoint Desktop Core Affinity drop-down list: |
| • | All Processors. Select this option (the default) to allow ViewPoint Desktop to run on any available processor. |
| • | Single Core. Select this option to force ViewPoint Desktop to run on the first physical processor. |
| 5 | Click Apply to save your changes. |
| 6 | Click Done to return to the Management Console. |