1. Updating the VPN server software
Over time, you should check for and install updates to the software installed on your VPN server according to the following steps.
The update process requires that the VPN server has public internet access. This access is assumed to be the case due to the nature and function of the VPN server.
If a VPN server restart is required
Some updates may require a restart of the VPN server to complete the update process. The restart may take up to 5 minutes depending on the underlying hardware. Make sure to perform the restart during a service window when the brief outage will not be noticed by ViewPoint Mobile or VPN phone users.
To update the VPN server software
| 1 | Log in to your VPN server, either via the VMware console or by using remote access if you have enabled it. |
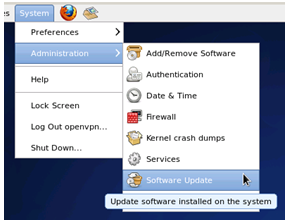
| 2 | Choose System > Administration > Software Update. |

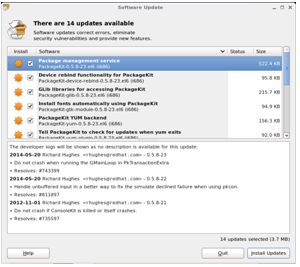
| 3 | Click Install Updates to install all of the listed updates. (You should always install all of the available updates.) |
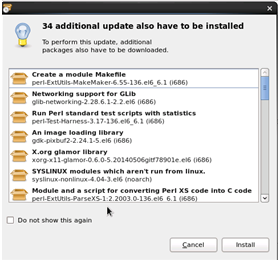
| 4 | The system may alert you if additional required updates are found. Click Install to include those in the update as well. |
| 5 | When you are prompted that authentication is required to update packages, in Password for root, enter the root authentication password that you specified when you set up the VPN server, and then click Authenticate. |
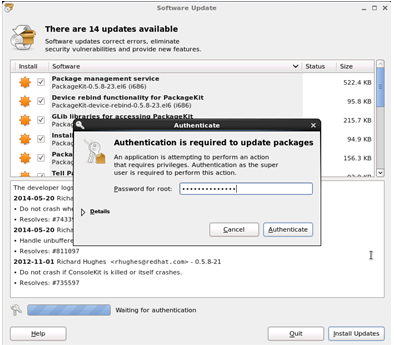
Note: The default root authentication password is the same as the Wave IP default password, which you should have changed at installation time. If your Wave Server manages VPN deployment, you can set the root authentication password using the Wave. To do so, go to VPN server settings > Advanced.
The system starts to download and install the listed updates.
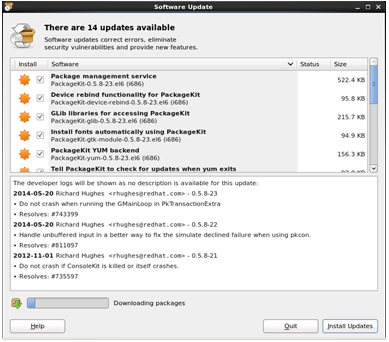
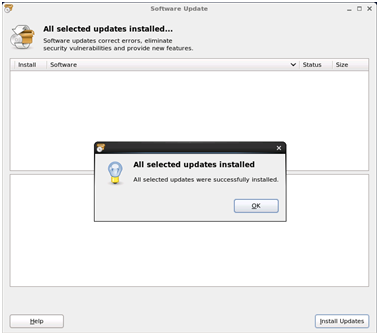
| 6 | Click OK when all updates have been installed. |
OpenVPN Server: Off-Wave configuration mode vs. Custom Deployment
OpenVPN Server configuration tasks
Specifying a user's VPN credentials