1. Data Networking Configuration
Before you can configure your Wave Server to pass-through data channels from a T-1 line, you must have already configured your analog and digital trunks. (See Configuring Analog and Digital Trunks.)
| • | Ensuring that the T-1 serial interface is set correctly |
| • | Assigning digital channels to a serial interface |
Ensuring that the T-1 serial interface is set correctly
When you connect an external router to your Wave Server’s T-1 module with a serial interface, you must:
| • | Assign channels of the T-1 trunk to the serial interface (see Assigning digital channels to a serial interface for details) |
| • | Ensure the serial interface is set correctly |
Typically, you will not need to change the interface settings unless you have a non-standard configuration.
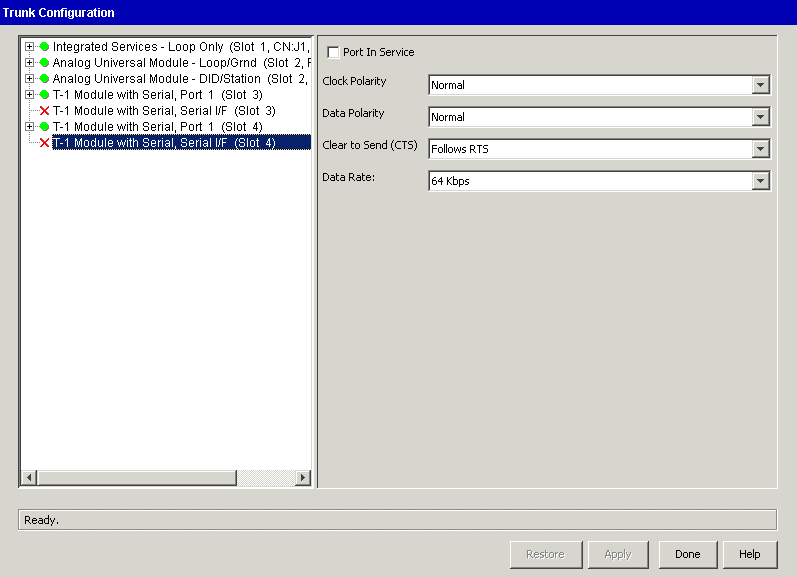
To ensure that the serial interface is set correctly
| 1 | If necessary, click the Administration tab of the Management Console. |
| 2 | Click Trunk Configuration, located in the Trunk Administration section. |
| 3 | Select the serial interface, labeled Serial I/F, and ensure that the settings are correct for your configuration. |

| • | Data Polarity. If you change the default setting, Normal, to Inverted, you must invert the data polarity on both ends of the connection. |
| • | Clear to Send. Follow RTS (Request to Send) is the default setting. Set this to Always On if the device at the other end of the connection is not driving RTS. |
| • | Data Rate. 64 Kbps is the default. Do not change this setting to 56 Kbps unless you know your connection’s maximum data rate is 56 Kbps. |
| 4 | Click Apply to save your changes. |
| 5 | Click Done to return to the Management Console. |