Open topic with navigation
1. Advanced Trunk and Channel Configuration
See the following advanced trunk and channel configuration topics:
Configuring advanced trunk settings
You can modify the advanced trunk settings for your T-1 trunk ports. You can find trunk Advanced Settings in the Trunk Configuration applet.
Caution! These are expert settings that should not be modified unless you are instructed to do so by your Vertical Technical Support representative.
To configure advanced trunk settings for a T-1 module
|
1
|
If necessary, click the Administration tab of the Management Console. |
|
2
|
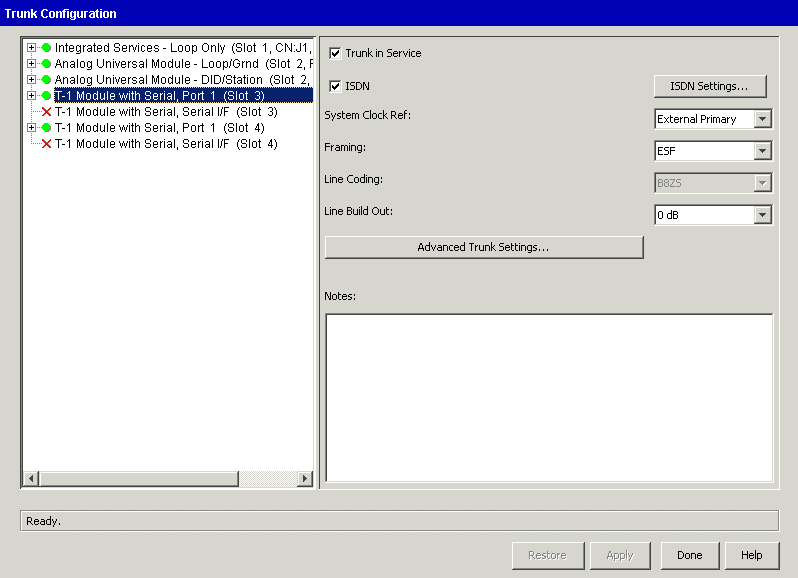
Click Trunk Configuration, located in the Trunk Administration section. |
|
4
|
Click Advanced Trunk Settings. |
|
5
|
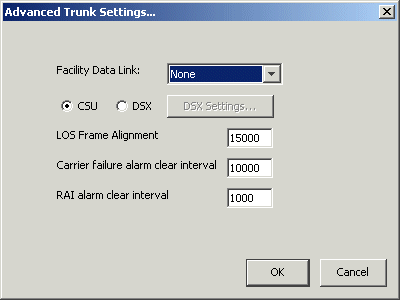
Set the Facility Data Link according to your Service Confirmation Letter. |
Two Facility Data Link (FDL) protocols are available. You may select either protocol listed, both protocols, or no protocol.
|
•
|
T1.403. Sends Performance Report Messages. The service provider can maintain a continuous history of trunk performance. The service provider can also send test messages to the trunk, if needed. |
|
•
|
TR54016. Sends messages when it is queried by the central office. If the service provider wants to know the status of a particular trunk, it will ask for it, and the Wave Server will send the information. |
This option is provided to allow the T-1 trunk to be tested and maintained by far-end equipment, for example, by the T-1 service provider’s equipment.
Your trunk provisioning letter should include this information.
T-1 service providers try to guarantee the up time of the trunks they provide in two ways:
|
•
|
They keep track of the physical layer errors in both directions, when possible, to proactively identify problems |
|
•
|
They send commands from their end of the T-1 to automatically loop T-1 trunks for error testing |
You can view these messages in the trace log by using the Trace Monitor diagnostic applet in the Remote Diagnostics Console.
If you are configuring FDL on a public network, refer to the T-1 service provider’s provisioning letter for information about the type of FDL support the service provider supports. If nothing is mentioned, select None.
If you are configuring FDL on a private network, you will typically select None. Since you control both of the T-1 endpoints, you can monitor statistics at each end.
If one trunk endpoint is not a Wave Server, select either T1.403 or TTR54016 according to what the management equipment supports on the non-Wave endpoint.
|
6
|
Choose one of the following settings: |
|
•
|
CSU. Select this option if you are connecting to the PSTN. When connecting to the PSTN, the FCC only allows the use of CSU mode. |
Note: Although CSU mode was developed for the PSTN, it generally works well for private T-1 lines as well, as long as you do not need to set advanced signal strength and shape parameters.
If you select CSU, go to step 10.
|
•
|
DSX. Select this option only in a private network configuration where you are connecting one Wave Server to another Wave Server using this trunk. In DSX mode, you have full control of all the possible signal strength and shape parameters that can be configured for the T-1 trunk. |
|
7
|
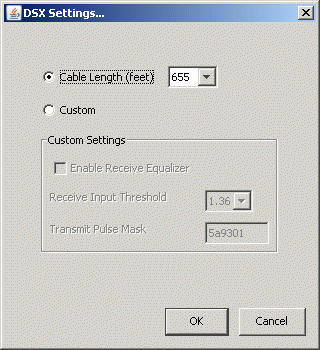
If you selectde DSX, click DSX Settings. |
|
8
|
Enter the following information: |
|
•
|
Cable Length (feet). Select the length of cable (in feet) to the other Wave Server. |
Note: Signal power level changes can be significant for short cable lengths, but not as much for longer lengths. Therefore, several short distance choices, and not as many long distant choices have been provided.
|
•
|
Custom. Select this option to specify custom DSX settings. You should only change these settings if you are working with your service provider to determine the correct settings. Refer to Customizing transmit and receive signal settings for more information on custom settings. |
|
9
|
Click OK to return to the Advanced Trunk Settings dialog. |
|
10
|
Modify the device timers settings, if appropriate, by typing new values in the text boxes. The value ranges and maximum number of digits allowed for these settings are: |
|
•
|
LOS Frame Alignment. Default=15000; Range=1000-30000 |
|
•
|
Carrier Failure Alarm Clear Interval. Default=10000; Range=1000-15000 |
|
•
|
RAI Alarm Clear Interval. Default=1000; Range=500-10000 |
|
11
|
Click Apply to save your changes. |
|
12
|
Click Done to return to the Management Console. |
Customizing transmit and receive signal settings
Setting trunk timing values
Configuring system-wide ISDN settings
Setting trunk timing values
Trunk timing values are classified as either inbound or outbound, depending on the direction of the call to which the timer applies.
Caution! These are expert settings that should not be modified unless you are instructed to do so by your Vertical Technical Support representative.
Setting digital trunk timing values
Setting analog trunk timing values
Configuring advanced trunk settings
Configuring system-wide ISDN settings
Setting digital trunk timing values
Caution! These are expert settings that should not be modified unless you are instructed to do so by your Vertical Technical Support representative.
To set the timing values for a digital trunk
|
1
|
If necessary, click the Administration tab of the Management Console. |
|
2
|
Click Trunk Configuration, located in the Trunk Administration section. |
|
3
|
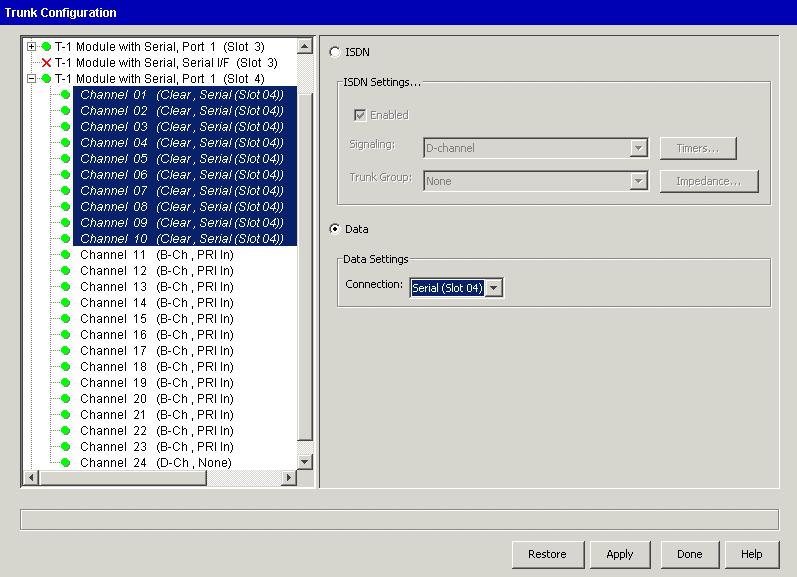
Display and select the channel(s) you want to configure. |
|
4
|
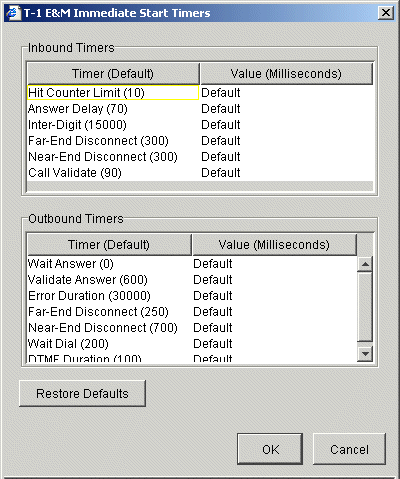
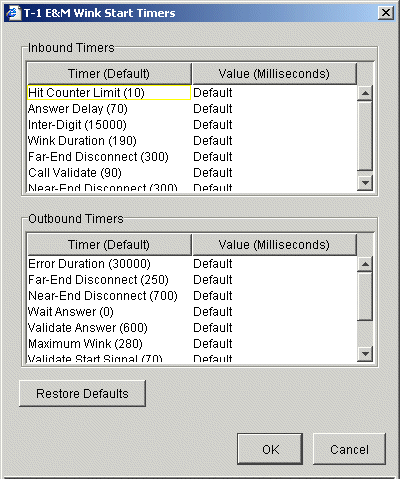
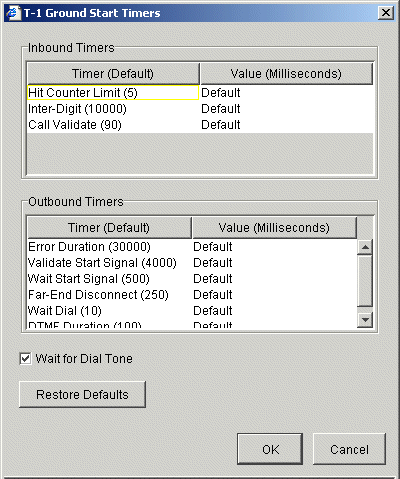
Click Timers. Depending on the channel settings, one of the following dialogs opens: |
|
•
|
T-1 E&M Immediate Start Timers dialog |
|
•
|
T-1 E&M Wink Start Timers dialog |
|
•
|
T-1 Ground Start Timers dialog |
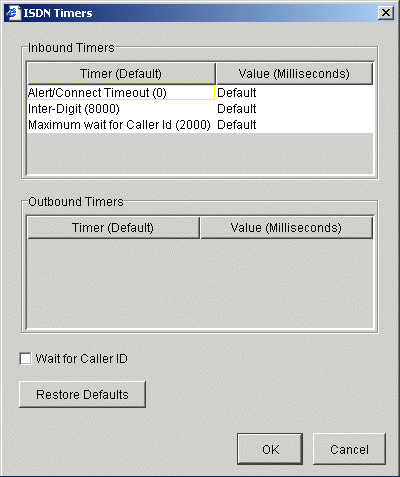
For information about specific T-1 trunk timers, refer to the tables in topic T-1 trunk timing values.
|
5
|
Click the Value field of the timer that you want to edit. A text box opens where you can type a new value. |
|
6
|
If the channel or channels you are editing are configured for Ground Start signaling, you can modify the Wait For Dial Tone setting by selecting or deselecting that check box. |
This check box tells Wave whether or not to expect dial tone on the channel before dialing.
|
7
|
Click Apply to save your changes. |
|
8
|
Click Done to return to the Management Console. |
Customizing transmit and receive signal settings
Setting analog trunk timing values
Configuring system-wide ISDN settings
Setting analog trunk timing values
Caution! These are expert settings that should not be modified unless you are instructed to do so by your Vertical Technical Support representative.
To set the timing values an analog trunks
|
1
|
If necessary, click the Administration tab of the Management Console. |
|
2
|
Click Trunk Configuration, located in the Trunk Administration section. |
|
3
|
Display and select the channel(s) you want to configure. |
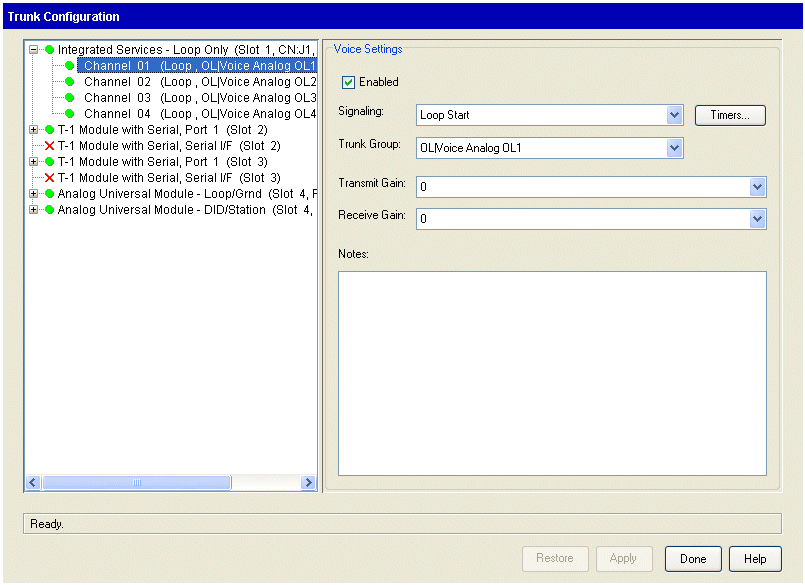
Note: You must select channels with the same Signaling configuration.
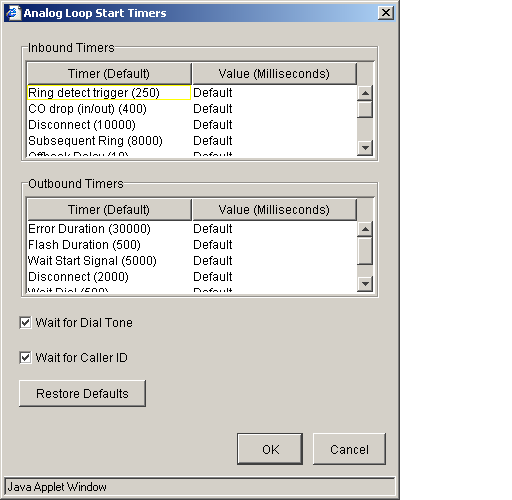
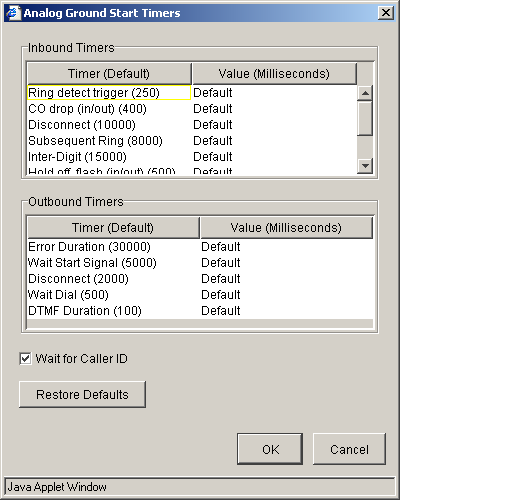
Depending on your signaling configuration for the selected trunks, you will see one of the following:
|
•
|
Analog Loop Start Timers dialog |
|
•
|
Analog Ground Start Timers dialog |
|
4
|
Click the Value field of the timer that you want to edit. A text box opens where you can type a new value. |
|
5
|
Enter a new value for the timer. |
For information about specific analog trunk timers, refer to the tables in Analog trunk timing values.
|
6
|
If you are using Loop[ Start signaling, you can specify the Wait for Dial Tone setting by selecting or deselecting that check box. |
This check box indicates whether Wave should expect a dial tone on the channel before dialing.
|
7
|
If you are using Loop Start signaling, select the Wait for Caller ID check box if you want to specify that the trunk should wait one ring for Caller ID information on an inbound call and answer on the second ring. (Caller ID information will come between the first and second rings.) |
|
8
|
Click Apply to save your changes. |
|
9
|
Click Done to return to the Management Console. |
Customizing transmit and receive signal settings
Setting digital trunk timing values
Configuring system-wide ISDN settings
Configuring system-wide ISDN settings
System-wide ISDN settings enable you to specify company-wide information about your ISDN channels, including how long-distance and international calls are dialed when using ISDN.
To set system-wide ISDN settings
|
1
|
If necessary, click the Administration tab of the Management Console. |
|
2
|
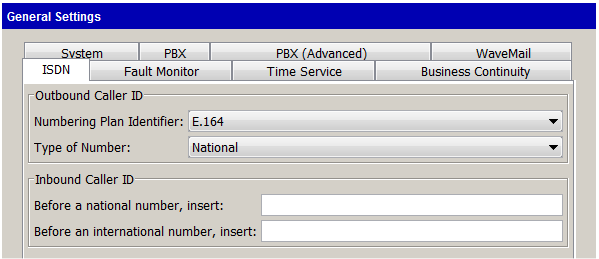
Click General Settings, located in the General Administration section. |
|
4
|
In the Outbound Caller ID section, specify the Numbering Plan Identifier as specified in your Service Confirmation Letter from the drop-down list. |
The numbering plan identifier (NPI) is used to indicate the general way phone numbers are constructed within the Caller ID. The two most common numbering plans are E.164—the world-wide ISDN numbering standard—and Unknown, indicating that the sender does not want to specify a plan. Private indicates that the calling party may use a unique string of digits for the calling party ID.
|
5
|
Specify the Type of Number as specified in your Service Confirmation Letter from the drop-down list. |
Note that the numbering plan you selected in step 2 may have four types of numbers: Unknown, Subscriber (local), National (long distance), and International.
Caution! This is an expert setting that should not be modified unless you are instructed to do so by your Vertical Technical Support representative.
|
6
|
In the Inbound Caller ID section, specify any digits to insert prior to a national number. |
For example, when Wave receives a call specified as National, it prepends a 1 in the Caller ID that is sent, so the receiver will know how to correctly return the call, if necessary.
|
7
|
Specify any digits to insert prior to an international number. |
For example, when Wave receives a call specified as International, it prepends a 011 in the Caller ID that is sent, so the receiver will know how to correctly return the call, if necessary.
|
8
|
Click Apply to save your changes. |
|
9
|
Click Done to return to the Management Console. |


